The Four Pass Loop: A Complete Guide for 2026
Planning to hike Colorado's iconic Four Pass Loop? Our 2026 guide covers permits, trail strategy, gear, and pro tips for conquering this epic trip.
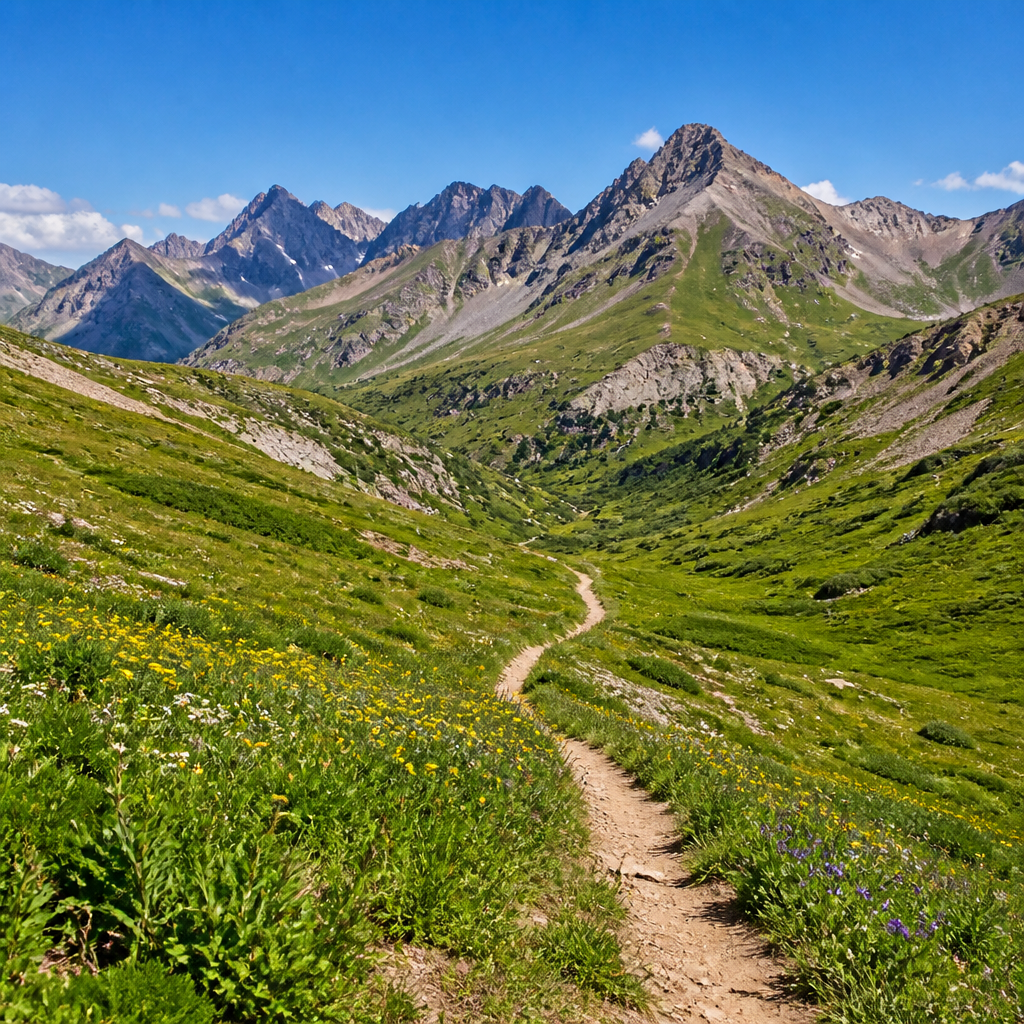
You’ve seen the photos. The twin peaks of the Maroon Bells perfectly reflected in a glassy lake, their reddish slopes catching the alpine glow. But you're a hiker, and you know the real magic lies beyond the frame, past the crowds at the photo-op spot. You're ready for the Four Pass Loop, the 27-mile trek that's rightfully earned its place as Colorado's premier backpacking trip.
This isn't just a walk in the park. It’s a serious undertaking that demands fitness, planning, and respect for high-altitude wilderness. But for those who put in the work, the rewards are immeasurable: wildflower-choked basins, star-filled nights, and the profound satisfaction of crossing four passes over 12,400 feet under your own power. This is your complete guide to making it happen in 2026.
Trail Snapshot: The Four Pass Loop
| Stat | Details | |---|---| | Distance | 27 miles (44 km) | | Total Elevation Gain | ~8,000 feet (2,438 m) | | Difficulty | Strenuous | | Typical Duration | 3-4 days | | Permit Required? | Yes, an overnight permit is required from May 1 - Oct 31. | | Best Season | Late July to Mid-September | | Dogs Allowed? | Yes, on leash. | | Bear Canister| Required for overnight trips. |
Getting There: Logistics & The Shuttle
The Four Pass Loop begins at the Maroon Lake Trailhead, located about 10 miles from Aspen, Colorado. Accessing this trailhead is the first logistical hurdle.
- Flying: Fly into Aspen/Pitkin County Airport (ASE) for the closest access, or Denver International Airport (DEN), which is a scenic 4-hour drive away.
- Driving & Parking: You cannot drive your personal vehicle directly to the trailhead during peak hours (roughly 8 AM to 5 PM) in the summer. All backpackers must park at the Aspen Highlands parking garage (for a fee) and take the Maroon Bells shuttle bus to the trailhead.
- The Shuttle: Reservations for the shuttle are mandatory and can be made online through the Aspen Chamber of Commerce website. These book up weeks in advance, so secure your spot as soon as you have your permit. Your overnight permit does not guarantee you a shuttle reservation.
Trail Description: A Clockwise Strategy
Most hikers complete the loop in 3 nights and 4 days. While it can be hiked in either direction, we recommend a clockwise route. This direction tackles the passes in a logical sequence and saves some of the most dramatic scenery for the middle of your trip. Here’s a typical day-by-day breakdown.
Day 1: Maroon Lake Trailhead to West Maroon Creek (~6.5 miles)
Your journey begins with a deceptively easy stroll along the paved path to Maroon Lake. Take your photo, then continue on the trail proper towards Crater Lake. The crowds thin dramatically after this point. The trail follows West Maroon Creek up a gentle valley. The goal for day one is to get a few miles in, find a good campsite past Crater Lake, and acclimatize. The altitude is real, and this is your body's first test.
Day 2: West Maroon Pass & Frigid Air Pass (~6 miles)
The real work begins. You'll wake up and immediately start the long, steady climb to West Maroon Pass (12,500 ft). The views looking back at the Maroon Bells are your reward. After cresting the pass, you'll descend briefly before tackling the short but steep connector trail to Frigid Air Pass (12,415 ft). The view from Frigid Air into Fravert Basin is, for many, the scenic highlight of the entire loop. A stunning panorama of green meadows and waterfalls unfolds below. You'll descend into this basin to find a campsite for the night.
Day 3: Trail Rider Pass to Snowmass Lake (~8 miles)
This is often the longest day. The morning starts with a climb through Fravert Basin's waterfalls before ascending the switchbacks to Trail Rider Pass (12,420 ft). From the pass, you get your first breathtaking glimpse of Snowmass Lake and Snowmass Mountain. The descent from Trail Rider is notoriously rocky and hard on the knees, so take your time. Your reward is a campsite at Snowmass Lake, one of the most magnificent alpine lakes in the Rockies. A late-afternoon swim (for the brave) is a rite of passage.
Day 4: Buckskin Pass & The Finish (~7 miles)
One last climb. From Snowmass Lake, it’s a long, sustained ascent to Buckskin Pass (12,500 ft). The thin air will be burning, but the views back towards Snowmass Lake and across the valley to Pyramid Peak are spectacular. From the top of Buckskin, it’s all downhill. The long, sweeping descent takes you through aspen groves and back into the familiar territory of the Maroon Creek valley. You'll eventually rejoin the main trail near Crater Lake for the final, triumphant walk back to the shuttle stop where your journey began.
Water, Permits & Camping
Permits
An overnight permit is required to camp in the Maroon Bells-Snowmass Wilderness. This system is highly competitive.
- How to Get One: Permits are released on a specific date in the spring (typically late February) on Recreation.gov. There is a lottery for peak season dates. Check the site well in advance for the exact 2026 process.
- Plan B: If you don't score a permit, don't show up. Rangers actively check permits. Consider a different, equally stunning Colorado backpacking trip instead.
Camping
Camping is allowed in designated sites within specified camping zones. You must camp in the zone your permit is for.
- Leave No Trace: Camp at least 100 feet from any water source and on durable surfaces. The meadows are fragile.
- Bear Canisters: Hard-sided bear canisters are mandatory. Not recommended, not suggested—required. Rangers will check. A BearVault BV500 or similar is perfect for this length of trip. Hang bags are not sufficient or allowed for food storage here.
Water
Water is plentiful along the entire loop. You will cross dozens of streams. There is no need to carry more than 2-3 liters at a time. However, you must treat all water. Giardia is common. A lightweight squeeze filter like the Sawyer Squeeze or Katadyn BeFree is ideal for this trip.
Essential Gear Checklist
Packing light is crucial for enjoying the high-altitude climbs, but you also need to be prepared for Colorado's notoriously fickle mountain weather. It can snow any month of the year.
The Big Three
- Backpack: A 45-60L pack is ideal. Look for something lightweight but comfortable, like an Osprey Exos 58 for men or Osprey Eja 58 for women.
- Shelter: A lightweight 2-person tent is perfect. The Big Agnes Copper Spur HV UL2 is a classic choice for its blend of low weight and livability.
- Sleep System: A 20°F (-6°C) quilt or sleeping bag is recommended. A down quilt from Enlightened Equipment or a bag like the Nemo Disco will keep you warm without weighing you down. Pair it with an insulated sleeping pad with an R-value of 3 or higher, like the Therm-a-Rest NeoAir XLite.
Clothing & Footwear
- Layers: Pack a merino wool base layer, a fleece mid-layer, a puffy jacket (like the Patagonia Down Sweater), and a reliable rain shell (Arc'teryx Beta Jacket). Do not skimp on rain gear.
- Footwear: The trail is rocky and rugged. Sturdy trail runners with good grip (Hoka Speedgoat 5) or lightweight hiking boots (Salomon X Ultra 4) are both excellent choices. Bring camp shoes!
Kitchen & Safety
- Stove: A simple canister stove like the MSR PocketRocket 2 is all you need.
- Bear Canister: A BearVault BV500 or similar hard-sided canister is required.
- Water Filter: Sawyer Squeeze or Katadyn BeFree.
- Navigation: While the trail is well-defined, carry a map (National Geographic Trails Illustrated #128) and compass. A satellite messenger like the Garmin inReach Mini 2 is highly recommended for emergency communication.
- First Aid: A well-stocked personal first-aid kit is non-negotiable. Include blister care.
Pro Tips for a Successful Trip
- Acclimatize Seriously: Spend at least two full nights at altitude (Aspen is at 8,000 ft) before starting your hike. This is the single best way to prevent altitude sickness.
- Start Early, Finish Early: Be on the trail by 7 AM at the latest each day. The goal is to be over the high passes before noon. Afternoon thunderstorms are a serious, life-threatening danger.
- Clockwise vs. Counter-Clockwise: We recommend clockwise for a better narrative arc and saving incredible views for the middle of the trip. Counter-clockwise front-loads the pain with a grueling climb over Buckskin Pass on Day 1, which can be tough before you're fully trail-hardened.
- Leave the Drone: Drones are illegal in all designated Wilderness Areas.
- Pack for the Cold: Even in August, nighttime temperatures can dip below freezing. Pack a warm hat, gloves, and that puffy jacket.
Now that you have the blueprint, it's time to start training, snagging those permits, and dialing in your gear. The Four Pass Loop is a Colorado rite of passage for a reason—go earn those views.
FAQ
How hard is the Four Pass Loop? It is a strenuous and challenging hike. You need a strong base level of fitness and must be prepared for the effects of high altitude. The combination of nearly 8,000 feet of climbing, all above 9,500 feet, makes it significantly harder than a similar-length hike at sea level.
Do I really need a permit for the Four Pass Loop? Yes. An overnight permit from Recreation.gov is mandatory for all camping between May 1 and October 31. Day hiking the loop does not require a permit, but this is an extreme undertaking reserved for elite trail runners.
What is the best direction to hike the loop? Both are great, but clockwise is generally preferred. It allows for better acclimatization before the first pass and builds the scenic drama more effectively. Counter-clockwise tackles the difficult Buckskin Pass first, which some prefer to get out of the way.
Are there bears in the Maroon Bells-Snowmass Wilderness? Yes, black bears are active in the area. This is why hard-sided bear canisters are required for all food, trash, and scented items. Following this rule protects you, your fellow hikers, and the bears themselves.
What's the best time of year to hike the Four Pass Loop? The prime, snow-free window is typically from late July through mid-September. Going in early July risks encountering dangerous snowfields on the passes. By late September, you risk early-season snowstorms.
<!-- seo-rank-booster:v1 -->Frequently Asked Questions
How hard is the Four Pass Loop?
The Four Pass Loop is a very strenuous 27-mile backpacking trip with approximately 8,000 feet of elevation gain. Hikers must cross four mountain passes above 12,400 feet, which requires excellent physical fitness, proper high-altitude acclimatization, and backpacking experience. This trail is not recommended for beginners.
What is the best month to hike the Four Pass Loop?
The best time to hike the Four Pass Loop is from late July through mid-September. This period generally ensures the high passes are free of snow, wildflowers are in full bloom, and the weather is most stable. Hiking before mid-July often involves navigating hazardous snowfields.
Which direction should I hike the Four Pass Loop?
Most backpackers hike the Four Pass Loop in a clockwise direction. This popular strategy tackles the steady climb to West Maroon Pass first, saving the dramatic views from Frigid Air Pass and the notoriously rocky descent from Trail Rider Pass for later in the trip. This direction also offers a good cadence for acclimatization and scenery.
Do you need a permit for the Four Pass Loop?
Yes, an overnight permit is mandatory to camp along the Four Pass Loop from May 1 to October 31. These permits are extremely competitive and must be booked in advance via Recreation.gov. You will also need a separate, mandatory reservation for the shuttle bus to access the trailhead.
Are bear canisters required on the Four Pass Loop?
Yes, approved bear-resistant food canisters are required for all overnight hikers in the Maroon Bells-Snowmass Wilderness. This is a strict rule to protect the local bear population and ensure hiker safety. Rangers patrol the area and will check for compliance.
Related on Bucketlist Field Guide
- Presidential Traverse — Challenge yourself on another one of America's premier multi-day treks, known for its rugged terrain and unpredictable weather.
- The Highline Trail — Experience another breathtaking high-altitude journey through the stunning mountain scenery of Glacier National Park.
- Skyline Trail Loop — Take on a classic multi-day loop around a famous peak, Mount Rainier, offering similar challenges of elevation and distance.
- Half Dome via Mist Trail — If you love iconic and demanding hikes, see what it takes to conquer Yosemite's famous granite dome, which also requires permits and planning.
- Cascade Canyon — For those who love the dramatic granite scenery of the Rocky Mountains, this classic Teton hike is a must-see.