The High Sierra Trail: A Complete Guide for 2026
Plan the ultimate trans-Sierra adventure with our complete guide to the High Sierra Trail. Get permit strategies, itineraries, and logistics for 2026.
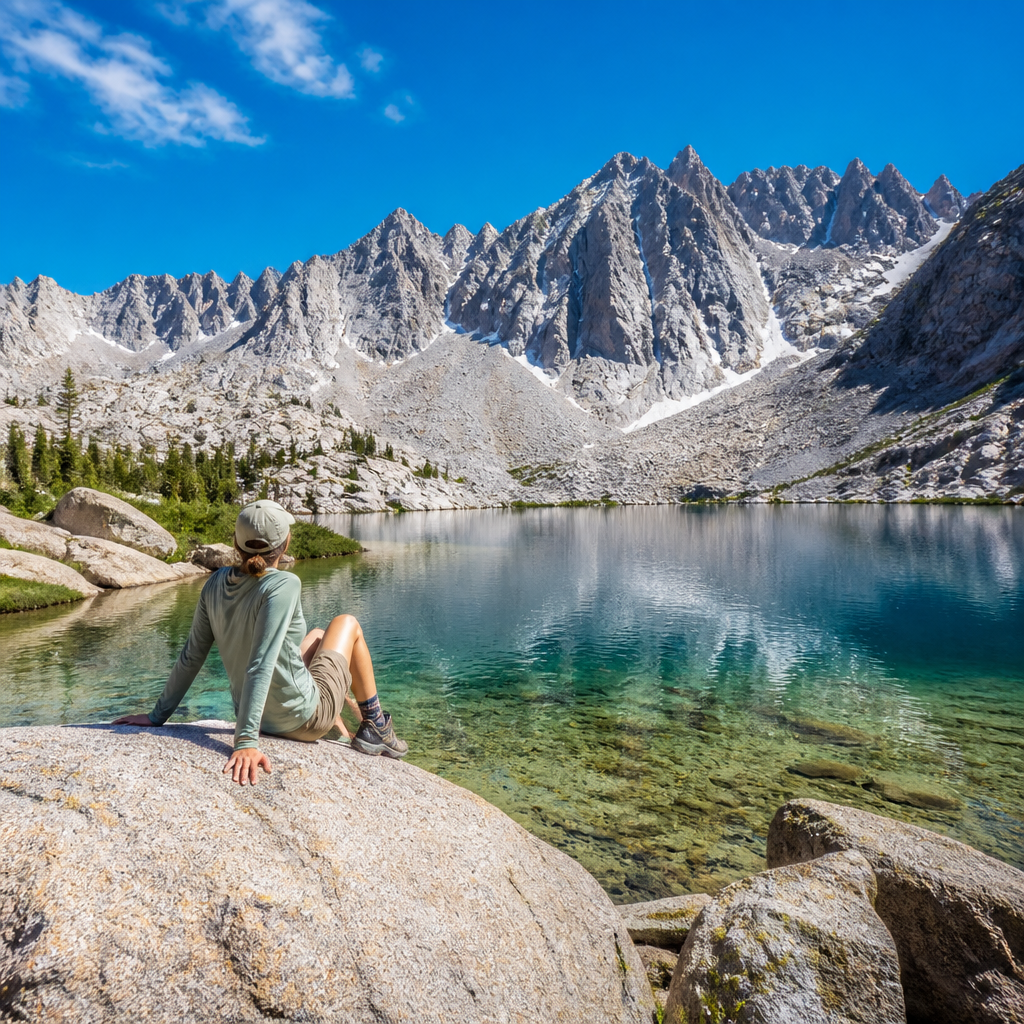
Fed up with the permit-lottery madness of the John Muir Trail? If you dream of crossing the Sierra Nevada—from the giant trees of the west to the towering granite of the east—but want a path with more solitude, the High Sierra Trail (HST) is your answer. This 72-mile masterpiece traverses the heart of Sequoia National Park, delivering all the alpine splendor of its more famous cousin with a fraction of the traffic.
It’s a serious undertaking, demanding strong legs, careful planning, and a healthy respect for the mountains. But the reward is a world of pristine lakes, sweeping vistas, and the profound silence of the high country. This is your complete field guide to making it happen in 2026.
High Sierra Trail: Snapshot
| Metric | Details | |:---|:---| | Distance | ~72.2 miles (116 km) | | Total Elevation Gain | ~15,500 feet (4,725 m) | | Difficulty | Strenuous | | Typical Duration | 6-8 days | | Permit Required? | Yes, via Recreation.gov lottery | | Best Season | Late July to late September | | Trailheads | Crescent Meadow (West) to Whitney Portal (East) |
Getting There & Away: The Logistical Crux
The HST is a point-to-point hike, which means transportation is your first and most significant planning challenge. You'll start deep in Sequoia National Park on the west side of the Sierra and finish at Whitney Portal, on the east side.
To the Start (Crescent Meadow): The easiest way is to fly into Fresno Yosemite International Airport (FAT) or Visalia Municipal Airport (VIS). From there, you'll need to drive or arrange a shuttle into Sequoia National Park. Parking your car at the Crescent Meadow trailhead is an option, but then you face the long journey back to it after your hike.
From the Finish (Whitney Portal): This is the tricky part. Whitney Portal is a small outpost above the town of Lone Pine, CA. From here, you must get back to your car in Sequoia National Park, a 5-6 hour drive. Your options are:
- Two Cars: The simplest solution if you're hiking with a group. Park one car at Whitney Portal and drive the other to Crescent Meadow.
- Private Shuttle: Several services operate in the Eastern Sierra and can be booked to drive you from Lone Pine back to Sequoia. This is convenient but expensive, often costing $500 or more. Book well in advance.
- Public Transit & Hitchhiking: A multi-day, complex option involving a bus from Lone Pine to Visalia (like the Eastern Sierra Transit), then trying to find a ride or park shuttle into Sequoia. It's an adventure in itself, but not for those on a tight schedule.
Our advice? Find a hiking partner and take two cars. It simplifies an otherwise massive logistical headache.
Section-by-Section Trail Description
Most hikers complete the HST in 6-8 days. Here’s a classic 7-day itinerary.
Day 1: Crescent Meadow to Bearpaw Meadow (11.5 miles)
You begin among giants. The trail winds through the Giant Forest, home to the largest trees on Earth. It's a relatively gentle introduction to the trail, with moderate climbs and descents. The day ends at Bearpaw Meadow, a High Sierra Camp with established tent sites and, crucially, bear lockers. Filter water from the nearby stream and soak in the first real views of the Great Western Divide, the massive wall of granite you'll be crossing tomorrow.
Day 2: Bearpaw Meadow to Hamilton Lakes (5 miles)
This is a shorter but stunning day. The trail clings to the side of a steep canyon, with dramatic drop-offs and non-stop views. Your destination is Upper Hamilton Lake, a postcard-perfect alpine lake nestled in a granite cirque. This is one of the most popular camps on the trail for a reason. Arrive early to claim a good spot, take a (frigid) swim, and prepare for the big climb ahead.
Day 3: Hamilton Lakes to Moraine Lake (12 miles)
Get an early start. Today you conquer Kaweah Gap. The morning begins with a spectacular climb past Precipice Lake, the famously surreal lake tucked directly under a sheer cliff, immortalized by Ansel Adams. The trail here is a marvel of engineering, blasted directly out of the granite. After the pass, you descend into the Big Arroyo and then climb again towards Moraine Lake. It's a long, tough day ending at another exquisite lake, known for its glassy reflections of the surrounding peaks.
Day 4: Moraine Lake to Kern River (10 miles)
Today is mostly downhill as you descend into the deep, U-shaped Kern River Canyon. The landscape changes from alpine granite to a drier, forested canyon floor. You'll pass the Kern Hot Springs—a rustic, rock-lined tub fed by a natural spring. It's a mandatory stop for a mid-hike soak. Camp near the river at the Junction Meadow campground. Be mindful of rattlesnakes in this warmer, lower-elevation zone.
Day 5: Kern River to Wallace Creek (11 miles)
Time to start climbing back to the high country. You'll follow the Kern River for a few miles before beginning a long, steady ascent up Wallace Creek. This day can feel like a bit of a slog, but you're gaining the elevation needed for the grand finale. The camping at Wallace Creek is excellent—flat, sheltered spots with reliable water. You'll also officially join the John Muir Trail here, so expect to see a few more hikers.
Day 6: Wallace Creek to Guitar Lake (5 miles)
This is another short but critical day focused on positioning and acclimatization. The trail climbs gently alongside Wallace and Wright Creeks, breaking out of the trees and into the high-alpine tundra. The final destination is Guitar Lake, sitting at 11,400 feet directly at the western base of Mount Whitney. The goal is to get here early, eat, hydrate, and get to sleep as soon as the sun sets. Your alpine start for the Whitney summit is only hours away.
Day 7: Guitar Lake to Whitney Summit & Out to Whitney Portal (16 miles)
The final push. Start hiking by 1 or 2 AM with a headlamp. The goal is to reach the summit of Mount Whitney (14,505 ft), the highest point in the Lower 48, for sunrise. The switchbacks up from the lake are grueling but well-graded. You'll drop your heavy pack at the trail crest junction and make the final 1.9-mile scramble to the summit with just the essentials.
After celebrating at the top, the journey is far from over. You have a long, knee-jarring 11-mile descent to the Whitney Portal trailhead. It's a day of incredible highs and a long, exhausting finish. But grabbing that burger and beer at the Whitney Portal Store is a rite of passage you'll never forget.
Water & Camping
Water: Plentiful. You'll cross a reliable stream or find a lake almost every few miles. There is no need to carry more than 2 liters at a time, except for the dry final push up Whitney. Always filter or treat your water; we recommend a fast-flowing filter like the Sawyer Squeeze or Katadyn BeFree.
Camping: You'll find a mix of established campgrounds with food storage lockers (Bearpaw, Hamilton Lakes, Junction Meadow) and countless opportunities for dispersed camping in scenic spots. Always practice Leave No Trace principles and camp on durable surfaces at least 200 feet from water.
Essential Gear for the High Sierra Trail
This is a lightweight backpacking trip, but the 'lightweight' part requires careful gear selection. Every ounce counts on those big climbs.
- Backpack: A 50-65 liter pack is ideal. Something comfortable that can handle 30-35 pounds, like an Osprey Atmos AG or Gregory Baltoro.
- Shelter: A lightweight tent is crucial for protection from mosquitos and afternoon thunderstorms. The Big Agnes Copper Spur HV UL2 is a perennial favorite.
- Bear Canister: This is mandatory. Rangers will check. A BearVault BV500 or a carbon fiber Wild Ideas Bearikade is perfect for a 6-7 day trip.
- Sleep System: A 15-20°F (-9 to -6°C) down quilt or sleeping bag is essential. Nights are cold above 10,000 feet. Pair it with an insulated sleeping pad with an R-value of 4 or higher, like the Therm-a-Rest NeoAir XLite.
- Cook System: A canister stove like the MSR PocketRocket 2 is efficient and reliable. Or, go stoveless with cold-soaked meals to save weight.
- Navigation: While the trail is well-marked, you must carry a map and compass and know how to use them. A GPS device or phone app (like Gaia GPS) with downloaded maps is an excellent secondary tool.
- Sun Protection: The sun is intense at high altitudes. Bring a wide-brimmed hat, sunglasses, and high-SPF sunscreen.
- Clothing: Standard layers: merino wool base layer, fleece mid-layer, puffy jacket for camp, and a waterproof rain shell for afternoon storms.
Pro Tips for a Smoother Hike
- Train for the Elevation: Don't underestimate the climbs. Your training hikes should include as much vertical gain as possible. If you can, arrive a day or two early and acclimatize at the Lodgepole or Dorst Creek campgrounds (~6,700 ft) before starting.
- Nail the Permit Lottery: HST permits are managed on Recreation.gov. The lottery for the entire season typically opens in early March. Be logged in and ready the moment it opens. Have multiple date ranges and group sizes in case your first choice is taken. A small number of walk-up permits are available, but don't count on them.
- Go West to East: While you can hike the trail east-to-west, the traditional westbound route is superior. It allows for a more gradual acclimatization profile and saves the dramatic Whitney summit for a grand finale.
- Manage Your Food: There is no resupply on the High Sierra Trail. You must pack all your food from start to finish. Plan for 2,500-3,500 calories per day. Dehydrated meals are your friend here.
FAQ
How do I get a permit for the High Sierra Trail?
Permits are released via a lottery system on Recreation.gov, usually in early March for the following summer. You apply for a specific start date and trailhead (Crescent Meadow). Be prepared with alternate dates.
What is the best time of year to hike the High Sierra Trail?
The trail is generally snow-free from late July to late September. August often has the best weather, with fewer mosquitos than July and a lower chance of early-season snow than September. Always check snowpack conditions before your trip.
Is the High Sierra Trail harder than the JMT?
Per mile, the HST has more elevation gain and loss than the JMT. However, being much shorter (72 vs. 211 miles), many find it more manageable as a single, continuous trip. The logistics, particularly transportation, are arguably more complex for the HST.
Do I really need a bear canister?
Yes. It is not optional. A park-service-approved hard-sided bear canister is required for the entire length of the trail. You will be in active bear country, and this is for your safety and the bears' well-being. Rangers may check for canisters and issue fines for non-compliance.
How do I get back to my car after hiking the High Sierra Trail?
This is the biggest logistical challenge. Your main options are a pre-arranged private shuttle (expensive but reliable), using a two-car system with a partner, or a complicated and lengthy combination of public transit and hitchhiking.
<!-- seo-rank-booster:v1 -->Frequently Asked Questions
How difficult is the High Sierra Trail?
The High Sierra Trail is considered a strenuous backpacking trip. Over its 72.2-mile length, it accumulates approximately 15,500 feet of elevation gain. The hike requires strong physical conditioning, experience at altitude, and careful planning for logistics and resupplies.
How long does it take to hike the High Sierra Trail?
Most hikers complete the High Sierra Trail in 6 to 8 days. A 7-day itinerary is very common, allowing for manageable daily mileage (typically 9-12 miles) and time to enjoy the stunning scenery of the High Sierra, including Hamilton Lakes and Kaweah Gap.
Which is harder, the JMT or HST?
While the John Muir Trail (JMT) is much longer (~211 miles vs. 72 miles) and has a higher total elevation gain, the High Sierra Trail is a concentrated and very challenging hike in its own right. The HST offers a similar trans-Sierra experience with more solitude, but both are serious undertakings requiring excellent physical fitness.
Do you need a permit for the High Sierra Trail?
Yes, a wilderness permit is mandatory to hike the High Sierra Trail. Permits are issued by Sequoia National Park through the Recreation.gov lottery system. Due to the trail's popularity, it's crucial to apply as soon as the lottery window opens for your desired dates.
What is the best time of year to hike the High Sierra Trail?
The best season to hike the HST is from late July through late September. By late July, the winter snowpack has typically melted from high passes like Kaweah Gap, and river crossings are safer. This period also offers warmer weather and fewer mosquitos compared to early summer.
Related on Bucketlist Field Guide
- Half Dome via Mist Trail — Tackle another iconic and permit-required granite ascent in California's Sierra Nevada.
- Presidential Traverse — Challenge yourself on another one of America's premier multi-day, high-alpine traverses.
- Angels Landing — Experience another world-famous trail known for its dramatic exposure and permit-based access.
- Mount Katahdin and the Knife Edge — Hike another legendary and strenuous peak in the US, famous for its thrilling, exposed ridgeline.