
Guide to the Teton Crest Trail (2026)
Planning to hike the iconic Teton Crest Trail? Our complete 2026 guide covers permits, logistics, a mile-by-mile breakdown, and the essential gear you need.
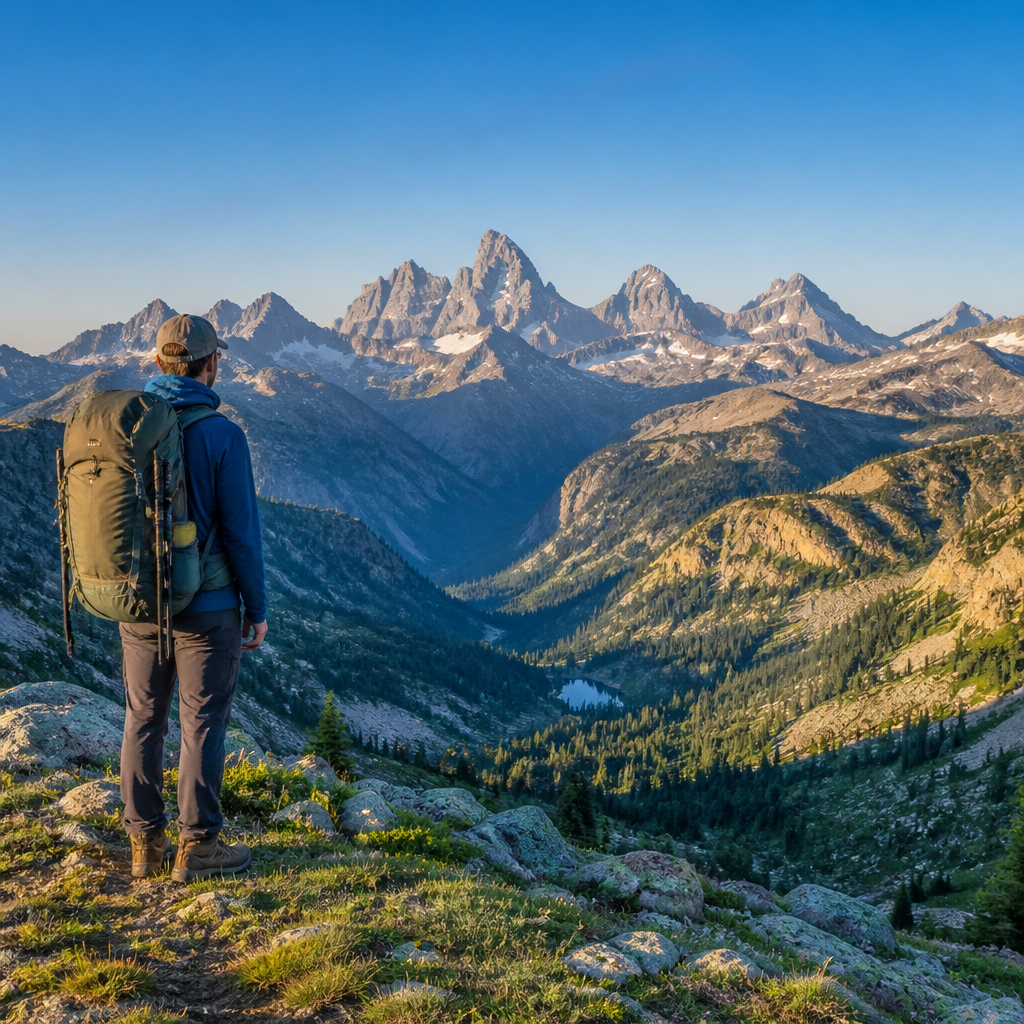
You’ve seen the photos. Jagged granite spires clawing at a perfect blue sky, reflected in an alpine lake so clear it looks like glass. For years, you've told yourself, "one day." That day is now. The Teton Crest Trail (TCT) isn't just a hike; it's a rite of passage for American backpackers, a 40-mile journey through one of the most dramatic mountain landscapes on the continent.
But unlike a casual day hike, the TCT requires serious planning. Permits, logistics, and grizzly bear country can feel intimidating. That's where we come in. This guide is your complete roadmap, built from dozens of trips and countless nights spent under those very same peaks. We'll walk you through everything from scoring a permit to what to pack, ensuring your "one day" is as epic as you imagined.
Trail Snapshot
| | | |---|---| | Distance | ~40 Miles (Teton Village to String Lake) | | Elevation Gain | ~8,500 feet | | Difficulty | Strenuous | | Permit Required? | Yes, for camping in Grand Teton National Park. Highly competitive. | | Best Season | Late July to mid-September | | Dogs Allowed? | No |
Getting There
The Teton Crest Trail is a point-to-point hike, which means logistics are half the battle. Your primary hub is the town of Jackson, Wyoming.
- Airport: Fly into Jackson Hole Airport (JAC), arguably the most scenic airport in the country, located right inside Grand Teton National Park.
- Trailhead (Start): The classic TCT start begins at the top of the Jackson Hole Mountain Resort Aerial Tram in Teton Village. This lets you skip roughly 4,000 feet of grueling, viewless climbing. Book your tram ticket online in advance to save time.
- Trailhead (End): Most hikers end at the String Lake Trailhead. From here, you'll need to get back to your car at Teton Village. Options include a pre-arranged taxi (expensive), a ride-share service (unreliable), or a two-car shuttle if you're hiking with a group. Check with local Jackson shuttle services for availability.
Trail Description: A Section-by-Section Guide
We recommend hiking the TCT from south to north. This orientation saves the most dramatic views of the Grand Teton for the latter half of your trip, providing a stunning climax.
Day 1: Teton Village Tram to Marion Lake (8 miles)
You'll start your day with a breathtaking 12-minute ride on the Aerial Tram, whisking you to 10,450 feet. After enjoying the summit views (and a waffle at Corbet's Cabin, if you fancy), you'll descend slightly and follow signs for the Rendezvous Mountain Trail. The trail meanders through wildflower meadows and open slopes, officially entering the Jedediah Smith Wilderness and Bridger-Teton National Forest. The highlight is cresting the Teton Shelf and dropping down to Marion Lake, a gorgeous alpine tarn and your first night's campsite. You don't need a GTNP permit for this site, making it a great strategic choice for your first night.
Day 2: Marion Lake to the Death Canyon Shelf (9 miles)
This is the day you truly enter the high country. After a steady climb from Marion Lake, you'll cross Fox Creek Pass and officially enter Grand Teton National Park. The world opens up here. The trail traverses for miles along the legendary Death Canyon Shelf, a wide bench carved into the side of a massive canyon. The views are constant and dizzying. To your right, the canyon floor plummets thousands of feet. To your left, sheer cliffs rise to the sky. Pitch your tent in the designated camping zone on the shelf for one of the most spectacular campsites of your life.
Day 3: Death Canyon Shelf to South Fork Cascade (12 miles)
Prepare for the main event. From the Shelf, you'll cross Mount Meek Pass and descend briefly into the beautiful, permit-free Alaska Basin. This is a popular spot and a good backup plan if you couldn't secure permits for the Shelf or Cascade Canyon. From the basin, the real work begins: a long, steady ascent to Hurricane Pass (10,400 feet).
As you crest the pass, you're hit with what is arguably the single best viewpoint in the entire Teton range. The Cathedral Group—the Grand, Middle, and South Teton—explodes into view, dominating the skyline above the Schoolroom Glacier. It's a view that justifies the entire effort. Take your time, soak it in, and then begin the long, knee-testing descent into the South Fork of Cascade Canyon, your campsite for the night.
Day 4: South Fork Cascade to String Lake (11 miles)
Your final day is a long but beautiful downhill stroll. You'll follow Cascade Creek as it tumbles through one of the park's most stunning canyons. You'll pass Lake Solitude, a worthy side-trip, before joining the main Cascade Canyon trail. Be prepared for a shock: after days of relative solitude, you'll begin to encounter day hikers coming up from Jenny Lake. The trail winds along the west shore of Jenny Lake, offering beautiful parting shots of the peaks. For a fee, you can take the ferry across the lake to cut off the final two flat miles. Your journey ends at the bustling String Lake picnic area, where a cold drink and a sense of accomplishment await.
Water & Camping
Water Sources
Water is generally plentiful along the entire Teton Crest Trail. You'll cross numerous creeks and pass many alpine lakes. However, all water must be treated. Giardia and other protozoa are present. A lightweight, reliable filter like the Sawyer Squeeze or Katadyn BeFree is essential.
Camping & Permits
This is the crux of planning a TCT trip. To camp within Grand Teton National Park (which includes the Death Canyon Shelf and Cascade Canyon zones), you need a backcountry permit.
- Advanced Lottery: One-third of permits are available via an advanced lottery on Recreation.gov, which runs from early January through May. This is your best chance. Apply early and be flexible with your dates and itinerary.
- Walk-up Permits: Two-thirds of permits are reserved for walk-up, issued no more than one day in advance of your trip start date. These are available at the Jenny Lake Ranger Station and the Colter Bay Visitor Center. To have a hope of getting one, you need to arrive very early (well before the station opens) and have multiple backup itineraries ready.
- Bear Canisters: Hard-sided bear canisters are required for camping anywhere in Grand Teton National Park's backcountry. No exceptions. Rent one in Jackson or bring your own, like a BearVault BV500.
Gear Checklist
This is a serious mountain route; pack accordingly. Your base weight should be as low as you can comfortably get it.
- Backpack: A 50-65 liter pack is ideal. An Osprey Aether/Ariel or a lighter Hyperlite Mountain Gear pack are excellent choices.
- Shelter: A sturdy, wind-worthy tent. The high passes can be extremely windy.
- Sleep System: A 15-20°F quilt or sleeping bag and a sleeping pad with an R-value of at least 3. Nighttime temperatures can drop below freezing, even in August.
- Kitchen: Your required bear canister, a stove like the MSR PocketRocket 2, fuel, a pot, and a spork.
- Clothing: No cotton. Pack synthetic or wool layers: hiking shirt, fleece mid-layer (like a Patagonia R1), and a puffy jacket. High-quality rain gear (jacket and pants) is non-negotiable.
- Navigation: While the trail is well-defined, carry a map and compass and know how to use them. A satellite messenger like a Garmin inReach Mini is highly recommended for safety.
- Essentials: Trekking poles (your knees will thank you), a headlamp, a water filter, sun hat, sunglasses, sunscreen, and bear spray. Carry the spray on your hip or shoulder strap, not in your pack.
Pro Tips for the TCT
- Acclimatize for Success: Spend at least one full day and two nights in the Jackson area (elevation ~6,200 ft) before starting your hike. This dramatically reduces your risk of altitude sickness.
- The Bear Safety Talk: This is grizzly country. Make noise while hiking, especially in dense brush or near streams. Hike in groups if possible. And again, carry bear spray and have your food and all scented items secured in your canister at all times.
- Embrace Flexibility: Your first-choice itinerary might not be available. Know the permit zones, understand the mileage between them, and have a Plan B and Plan C ready when you approach the ranger's desk.
- Go in September: For peak solitude and fewer mosquitos, plan your hike for after Labor Day. The trade-off is a higher chance of cold weather or an early season snowstorm, so be prepared.
FAQ
Q: How hard is the Teton Crest Trail? A: It's a strenuous hike best suited for experienced backpackers or very fit hikers with strong mental fortitude. You'll be dealing with high altitude, significant daily mileage with elevation gain, and unpredictable mountain weather. That said, it is not a technical climb and is very achievable with proper training and planning.
Q: Do I really need a bear canister? A: Yes. It is not optional; it is required by the National Park Service for all backcountry campsites within Grand Teton National Park. Rangers do check for them.
Q: What is the best direction to hike the Teton Crest Trail? A: Hiking from south to north (Teton Village to String Lake) is highly recommended. This saves the most dramatic payoff views of the Grand Teton for the second half of the trip, creating a more spectacular journey.
Q: Can you hike the Teton Crest Trail without a permit? A: Technically, you could thru-hike it in a single (very long) day without a permit. You can also legally camp without a GTNP permit in the Jedediah Smith Wilderness (Marion Lake) and Alaska Basin sections. However, to complete the classic multi-night trek, a permit for the GTNP zones is essential.
Q: What's the best time of year to hike the TCT? A: The sweet spot is from late July to mid-September. Earlier, and you'll face dangerous snowpack on high passes. Later, and you risk early winter storms. For fewer crowds and no bugs, aim for the two weeks after Labor Day.
<!-- seo-rank-booster:v1 -->Frequently Asked Questions
How difficult is the Teton Crest Trail?
The Teton Crest Trail is considered strenuous. Spanning approximately 40 miles with over 8,500 feet of elevation gain, the route involves multiple high-elevation passes and requires excellent physical fitness. Hikers should be prepared for long days, steep climbs, and the challenges of backpacking at altitude.
Do you need a permit for the Teton Crest Trail?
Yes, a permit is required for all overnight camping within Grand Teton National Park. These backcountry permits are highly competitive and can be reserved in advance or obtained as a walk-up. Some sections, like the Marion Lake area in Jedediah Smith Wilderness, do not require a park permit, offering some planning flexibility.
When is the best time to hike the Teton Crest Trail?
The best season to hike the Teton Crest Trail is a narrow window from late July to mid-September. This period offers the highest likelihood of snow-free trails, especially over high passes like Paintbrush Divide and Hurricane Pass. Hiking earlier may involve dangerous snow travel, while late September brings the risk of early-season snowstorms.
How many days does it take to hike the Teton Crest Trail?
Most backpackers take between 3 and 5 days to complete the Teton Crest Trail. A 4-day itinerary is common, allowing for manageable daily mileage and time to enjoy the spectacular scenery. Your exact duration will depend on your fitness level, desired pace, and campsite availability.
What is the best direction to hike the Teton Crest Trail?
Most hikers prefer a south-to-north route, typically starting from the Aerial Tram at Teton Village and ending at String Lake. This direction saves the most dramatic and iconic views of the Grand Teton and the Cathedral Group for the latter half of the journey, providing a stunning climax to the hike.
Related on Bucketlist Field Guide
- Cascade Canyon — Explore a key section of the Teton Crest Trail as a stunning day hike or part of a longer trek.
- The Highline Trail — Tackle another iconic, high-alpine traverse in Glacier National Park for similar jaw-dropping views.
- Presidential Traverse — Challenge yourself on a strenuous multi-day ridgeline hike across New Hampshire's tallest peaks.
- Hoh River Trail to Blue Glacier — Experience a different kind of epic multi-day backpack through a temperate rainforest to a massive glacier in Olympic National Park.