The Four Pass Loop Trail Guide (2026)
Planning to hike the iconic Four Pass Loop? Our 2026 guide covers permits, trail sections, gear, and pro tips for conquering this Colorado classic.
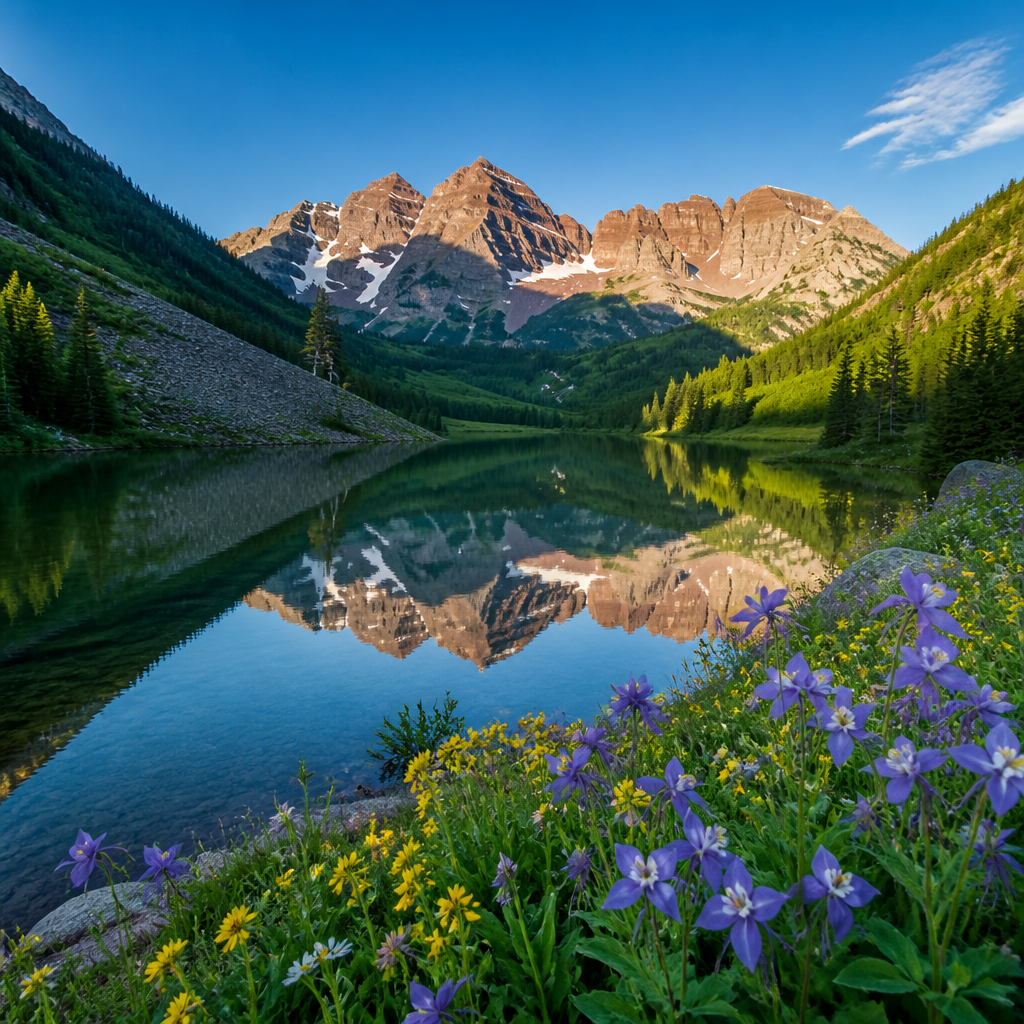
So, you've set your sights on the crown jewel of Colorado backpacking. The Four Pass Loop isn't just a hike; it's a rite of passage. A 27-mile circuit that tests your legs and lungs while delivering some of the most staggering alpine scenery in North America. But tackling four passes over 12,000 feet requires more than just ambition—it requires a solid plan.
You're wondering if you have what it takes, what gear you need, and how to navigate the notoriously tricky permit system. You're in the right place. This is your complete field guide to not just surviving, but thriving on the Four Pass Loop in 2026.
Trail Snapshot
| Stat | Details | | --- | --- | | Distance | ~27 miles (43.5 km) circuit | | Total Elevation Gain | ~8,000 feet (2,438 m) | | Difficulty | Strenuous (high altitude, steep climbs, potential for severe weather) | | Permit Required? | Yes, overnight permits are mandatory and highly competitive. | | Best Season | Mid-July through mid-September | | Dogs Allowed? | Yes, on leash. |
Getting There
Your journey begins near Aspen, Colorado. The closest major airport is Denver International (DEN), about a 4-hour drive away. Aspen/Pitkin County Airport (ASE) is much closer but often more expensive.
The Maroon Bells Shuttle & Parking: Access to the Maroon Lake Trailhead, where the loop begins, is restricted. You cannot drive directly to the trailhead during peak hours (typically 8 AM to 5 PM) in the summer.
- Drive & Park: Your best bet is to park at the Aspen Highlands Parking Garage ($). From there, you must purchase a ticket for the Maroon Bells shuttle bus.
- Shuttle: The bus runs regularly and will drop you at the trailhead. This is the standard procedure for most hikers. Check the Aspen Chamber website for the most current 2026 shuttle schedule and reservation info—they often sell out.
- Overnight Parking: If you have an overnight permit, you may be able to secure a parking reservation at the trailhead, but these are extremely limited. The shuttle is the more reliable option.
Trail Description: A 4-Day Itinerary
Most backpackers complete the loop in 3 nights and 4 days. While some trail runners do it in a day, and others take a more relaxed 5-day pace, this itinerary offers a balanced mix of challenge and enjoyment. We recommend hiking clockwise, tackling West Maroon Pass first.
Day 1: Maroon Lake to West Maroon Valley (~7 miles)
You'll start at the hyper-scenic but often crowded Maroon Lake. Snap your postcard photo and push past the day-trippers toward Crater Lake. The trail climbs steadily through aspen groves before reaching the lake, a great spot for a quick break.
From Crater Lake, follow the signs for the West Maroon Trail. The valley opens up, and the crowds thin dramatically. You'll spend the afternoon ascending gently through meadows and past beaver ponds, with the pyramid-like Sievers Mountain dominating the view. Find a campsite in the upper valley, well before the final steep switchbacks to the pass. This allows you to acclimate and set up for an early start on Day 2.
Day 2: West Maroon Valley to Fravert Basin (~7 miles)
This is the day of two passes. Wake up early to tackle the 1,500-foot climb to West Maroon Pass (12,500'). The switchbacks are relentless, but the view from the top, looking back toward the Maroon Bells and forward into the next valley, is your reward.
After descending from the pass, you'll cross a lush basin and begin the shorter but equally stunning climb to Frigid Air Pass (12,415'). The view from here is arguably the best on the entire loop, offering a jaw-dropping perspective of the Maroon Bells massif. It’s a perfect lunch spot.
The descent into Fravert Basin is a highlight. You'll navigate through some of the most beautiful wildflower displays in Colorado. The camping in Fravert Basin is pristine and feels wonderfully remote. Find a spot near the creek and rest up.
Day 3: Fravert Basin to Snowmass Lake (~6 miles)
Prepare for the loop's longest climb. From the valley floor, you'll ascend nearly 2,000 feet to Trail Rider Pass (12,420'). The trail is well-graded but sustained. As you crest the pass, you're hit with the breathtaking sight of Snowmass Lake, a massive, turquoise jewel cradled beneath Snowmass Mountain (a 14er).
The descent to the lake is steep and rocky. Take your time. Camping is in designated sites only at Snowmass Lake, and it's a popular spot for a reason. Arrive early to claim a good one. An evening swim in the frigid water is a rite of passage for the brave.
Day 4: Snowmass Lake to Maroon Lake (~7 miles)
Your final day begins with a significant climb out of the Snowmass Lake basin to Buckskin Pass (12,462'). This ascent is long and can feel like a slog, but the panoramic views of the surrounding Elk Mountains from the top are spectacular.
The descent from Buckskin Pass is famously long—over 3,000 feet down to the trailhead. The upper section is steep and rocky, eventually giving way to forested switchbacks that seem to go on forever. When you finally pop out near Crater Lake again, you'll rejoin the main trail and walk the final, familiar mile back to the shuttle stop at Maroon Lake. You've done it.
Water & Camping
Water Sources
Water is plentiful throughout the loop. You'll cross numerous creeks and are never more than a few miles from a reliable source. However, all water must be treated. A lightweight squeeze filter like the Sawyer Squeeze or Katadyn BeFree is perfect for this trail. In late season (September), some smaller streams may be dry, but the main creeks and lakes will still be flowing.
Camping Regulations
- Permits: An overnight permit for the Maroon Bells-Snowmass Wilderness is mandatory from May 15 to Oct 31. These are available on Recreation.gov and are released on a specific date in late winter. They sell out within minutes. Be logged in and ready the moment they go live.
- Bear Canisters: An IGBC-approved bear-resistant food container (like a BearVault BV450 or BV500) is required. No exceptions. Bears are active in this area.
- Campsites: Camping is restricted to designated sites at Crater Lake and Snowmass Lake. In all other areas (West Maroon Valley, Fravert Basin), you must follow Leave No Trace principles and camp at least 200 feet from water and trails. Camp on durable surfaces and use existing, established sites whenever possible to minimize impact.
Gear Checklist
Packing light is critical for enjoying this high-altitude trek. Every pound feels like five when you're above 12,000 feet. Focus on a lightweight, reliable system.
The Essentials
- Backpack (40-60L): A pack like the Osprey Exos 58 or Hyperlite Mountain Gear Southwest 3400 provides the right balance of weight and support.
- Tent: A sturdy, lightweight 2-person tent is ideal. The Big Agnes Copper Spur HV UL2 is a trail favorite.
- Sleep System: A 20°F quilt or sleeping bag and an insulated sleeping pad (like the Therm-a-Rest NeoAir XLite) are crucial for cold alpine nights.
- Bear Canister: A BearVault or similar canister is mandatory. Pack it empty and fill it at the trailhead to maximize pack space.
Kitchen & Hydration
- Stove: An efficient canister stove like the MSR PocketRocket Deluxe.
- Cook Pot & Spoon: Titanium for weight savings.
- Water Filter: Sawyer Squeeze or Katadyn BeFree.
- Water Bottles/Bladder: Capacity for 2-3 liters.
Clothing (No Cotton!)
- Rain Jacket: A non-negotiable item. Afternoon thunderstorms are common. An Arc'teryx Beta Jacket is bombproof.
- Puffy Jacket: A down or synthetic insulated jacket for camp and cold mornings. The Patagonia Down Sweater is a classic.
- Hiking Layers: One set of hiking clothes (shirt, shorts/pants) and one set of sleep clothes.
- Base Layers: Merino wool top and bottom for sleeping.
- Socks: 3 pairs of merino wool socks (Darn Tough or Smartwool).
- Footwear: Broken-in waterproof hiking boots (Salomon Quest 4 GTX) or sturdy trail runners (Hoka Speedgoat 5) if you prefer.
Safety & Navigation
- Navigation: A GPS device or phone with downloaded maps (Gaia GPS or AllTrails) is essential. Carry a physical map and compass as a backup.
- Satellite Messenger: A Garmin inReach Mini 2 for communication and emergencies. Cell service is non-existent.
- Headlamp: With extra batteries.
- First-Aid Kit: Include blister care, pain relievers, and any personal medications.
Pro Tips for a Successful Trip
- Acclimatize Seriously: This is the #1 rule. Spend at least two full days at altitude (8,000+ feet) in Aspen, Leadville, or another mountain town before starting your hike. Do some light day hikes. Altitude sickness can end your trip before it starts.
- Start Early, Finish Early: Be on the trail by 7 AM, especially on pass days. The goal is to be over the pass and descending by noon to avoid the typical afternoon thunderstorms and lightning.
- Check Snow Conditions: Before a trip in July (or even early August), check recent trail reports or call the Aspen-Sopris Ranger District. Lingering snow on the passes can be treacherous and may require an ice axe and microspikes.
- Monitor the Weather: Use your satellite messenger's weather forecast feature daily. Be prepared to alter your plans if a major storm system is moving in.
- Pace Yourself: The climbs are marathons, not sprints. Use a steady, rhythmic pace (the "rest step") and take frequent, short breaks to catch your breath.
FAQ
How hard is the Four Pass Loop really? It is a very strenuous hike. You need to be in excellent physical condition, comfortable with long, steep climbs at high altitudes, and prepared for variable mountain weather. It is not a beginner backpacking trip.
Do I need a permit to day-hike the Four Pass Loop? No, permits are only required for overnight stays within the core permit zone. However, day-hiking the entire 27-mile loop with 8,000 feet of gain is an elite mountain running endeavor, not a hike.
How many days does the Four Pass Loop take? The most common itinerary is 4 days and 3 nights. This allows for a manageable pace of 6-8 miles per day. Very fit hikers can do it in 3 days/2 nights, but this feels rushed for most. A 5-day/4-night trip allows for a more relaxed pace and potential side trips.
Are bear canisters actually required? Yes, absolutely. An Interagency Grizzly Bear Committee (IGBC) approved bear-resistant container is mandatory for all food, trash, and scented items. Rangers patrol the area and will issue tickets. This is for your safety and the bears' well-being.
What's the best direction to hike the loop, clockwise or counter-clockwise? Clockwise (starting with West Maroon Pass) is generally recommended. This direction provides a more gradual first day, gets two passes done on Day 2, and offers arguably better views as you approach Frigid Air Pass. Counter-clockwise involves a very long, grueling climb up Buckskin Pass on Day 1.