Mastering Water Crossings: A Field Guide for Hikers (2026)
Learn how to safely navigate water crossings on your hikes in 2026, from gentle streams to roaring rivers, with expert techniques and gear essentials.
Mastering Water Crossings: A Field Guide for Hikers (2026)
The trail ends abruptly. Before you, a rushing creek, wider and deeper than anticipated, bars your path. For many hikers, that sudden confrontation with moving water can be daunting, even paralyzing. Is it safe to cross? How do I even start? Will I end up soaked, or worse, injured? If these questions echo in your mind, you're not alone. Mastering water crossings is a critical wilderness skill that elevates your confidence and expands the horizons of your hiking adventures.
Moving water, whether a gentle ford or a roaring river, presents unique challenges. This guide isn't about telling you to avoid every wet foot – sometimes it's inevitable. Instead, we’ll equip you with the knowledge and techniques to assess risks, choose the safest path, and execute crossings with confidence, transforming a potential obstacle into just another part of the journey.
TL;DR: Quick Tips for Water Crossings
- Assess, don't guess: Always evaluate depth, current, and bottom conditions before entering the water.
- Unbuckle pack straps: Hip belt and sternum strap can become a drowning risk if you fall.
- Face upstream: Lean into the current to maintain balance.
- Use a trekking pole (or two): Provides crucial third points of contact.
- Remove socks/liners: Prevent blisters from wet feet later.
- Never cross alone: If possible, cross with a partner for support.
Why Water Crossings Demand Respect
Water crossings aren't just about getting your feet wet; they're about managing dynamic environmental factors. Currents can sweep you off your feet, slippery rocks can lead to falls and injuries, and cold water can induce hypothermia. Underestimating these dangers is a common mistake that can turn a beautiful hike into a dangerous ordeal. Respect for the water means understanding its power and knowing your limits.
Step-by-Step: Safely Navigating Water Crossings
Crossing water safely is a systematic process. Rushing will only increase your risk. Break it down into these manageable steps:
1. Evaluate the Situation: Your Pre-Crossing Checklist
Before you even think about stepping in, stop and assess. This is the most crucial step.
- Look Upstream and Downstream: Scout for safer, shallower, or slower sections. Look for natural bridges (fallen logs, rock series) or wider, braided sections. Be wary of bends where the current can be stronger.
- Estimate Depth and Current: Observe how the current interacts with rocks or debris. If the water is above your knees, or the current is strong enough to make crossing difficult for a solid stick, reconsider. If it’s muddy, depth perception is impossible; probe with a stick or pole.
- Check the Bottom: Can you see the bottom? If not, use a trekking pole to probe for submerged obstacles, slippery rocks, or sudden drop-offs. A uniform, gravelly bottom is ideal.
- Consider Alternatives: Is there a bridge nearby, or another trail? Is turning back a safer option than risking the crossing?
- Group Dynamics: Is everyone in your group comfortable and capable? The strength of the weakest link determines the safety of the group.
2. Prepare Yourself and Your Gear
Proper preparation mitigates risk and ensures comfort after the crossing.
- Unbuckle Your Pack: THIS IS CRITICAL. Release your hip belt and sternum strap. If you fall and get swept downstream, your pack can act like an anchor, holding you under. You want to be able to shed it quickly.
- Change Footwear (Optional but Recommended): If it's a significant crossing, consider changing into water shoes, old sneakers, or sandals that offer good grip and protection. Hiking boots, once soaked, are heavy, uncomfortable, and prone to causing blisters. If you don't have dedicated water shoes, keep your hiking boots on for protection, but know they'll be wet.
- Roll Up Pants/Shorts: Keep clothing out of the water if possible to prevent it from weighing you down or creating drag.
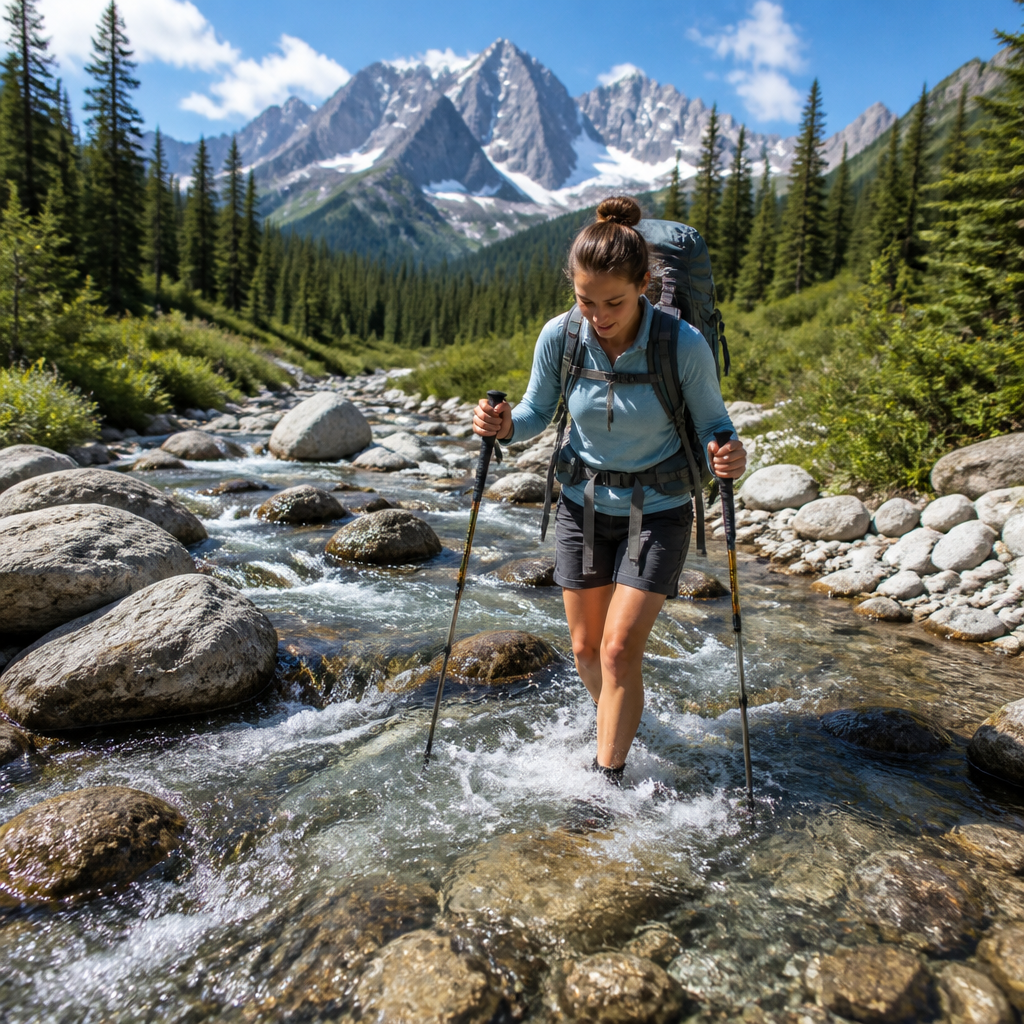
- Use Trekking Poles (Essential): Extend your poles to their maximum length. They provide two additional points of contact, significantly increasing your stability. If you only have one, use it on your upstream side.
- Protect Valuables: Place electronics, sleeping bags, and extra insulation in dry bags or waterproof stuff sacks inside your pack. Assume your pack will get wet.
3. The Crossing Technique: Be Deliberate and Controlled
This is where technique makes all the difference.
- Face Upstream and Angle Slightly Downstream: This allows the current to push against your body, rather than from the side, providing stability. Imagine you're walking diagonally against the flow.
- The Tripod Method: Use your trekking poles. Always have two feet and one pole, or one foot and two poles, in contact with the riverbed. When moving, pick up one foot, plant a pole securely, then move the foot. Avoid jumping or making sudden movements.
- Shuffle, Don't Step: Slide your feet along the bottom rather than lifting them high. This helps you feel for obstacles and maintain continuous contact with the riverbed.
- Keep Your Eyes Upstream: Watch for submerged hazards, changes in current, or floating debris that might be coming your way.
- Breathe and Remain Calm: Panicking can lead to poor decisions and loss of balance. Focus on your movements.
4. Post-Crossing Ritual: Back to the Trail
You've made it across! Now, get ready to hike again.
- Dry Off (If Needed): If you changed footwear, towel off your feet (microfiber towels are great) and put on fresh, dry socks before putting your hiking boots back on. This prevents blisters. If your boots are soaked, wring out your socks and embrace the wetness, knowing it won't last forever.
- Re-buckle Pack: Secure your hip belt and sternum strap.
- Check for Group Completion: Ensure everyone in your party has crossed safely and is ready to continue.
Gear That Helps with Water Crossings
While not strictly necessary for every crossing, certain gear can significantly improve safety and comfort.
- Trekking Poles: Indispensable. Look for durable, adjustable poles. Leki and Black Diamond are industry leaders known for their reliable locking mechanisms.
- Water Shoes/Sandals: Shoes like Keen Newport H2 or Teva Hurricane XLT2 offer protection, grip, and dry quickly. Lightweight trail running shoes can also double as approach/water shoes.
- Dry Bags/Pack Liners: Essential for keeping critical gear dry. Sea to Summit eVent Compression Dry Sacks for sleeping bags and electronics are highly recommended. A heavy-duty garbage compactor bag makes an excellent, inexpensive pack liner.
- Quick-Dry Apparel: Nylon or synthetic shorts/pants dry much faster than cotton, reducing discomfort and the risk of chafing.
- Microfiber Towel: Small, lightweight, and highly absorbent, perfect for drying feet quickly.
Common Mistakes to Avoid
Knowing what not to do is just as important as knowing what to do.
- Crossing with a Buckled Pack: As mentioned, this is a major safety hazard. Unbuckle!
- Crossing Barefoot: Unless you are absolutely certain of a smooth, rock-free bottom, going barefoot risks cuts, punctures, or stubbed toes. Always protect your feet.
- Trying to Jump Across: Never attempt to jump over a stream that you can't confidently clear. A short jump with a fall often results in far worse outcomes than a controlled ford.
- Underestimating Cold Water: Cold water rapidly saps body heat. If the water is frigid, try to cross quickly and then get into dry clothes immediately to prevent hypothermia.
- Ignoring the Strongest Current: Always choose the path with the weakest current, even if it means a slightly longer route. The shortest distance might not be the safest.
- Not Communicating with Your Group: If you're with others, establish a plan, communicate concerns, and offer support. Consider linking arms or using a human chain for wider, slower crossings.
FAQ
Q: What if the water is too deep or fast to cross safely?
A: If you've assessed the situation and determined it's unsafe, do not attempt the crossing. Turn back, find an alternate route (if one exists), or wait. Sometimes, water levels drop significantly by morning or after heavy rain subsides. Your safety is paramount.
Q: Can I use a rope for water crossings?
A: Using a rope for a crossing can be very dangerous if you're not trained in swiftwater rescue. A rope can create a 'clothesline' effect, tripping people, or trap a person against an obstacle. Only use a rope if you have formal training and specific equipment for such an operation.
Q: Should I remove my boots or keep them on for the crossing?
A: This depends on the crossing and your personal preference. For shallow, short crossings, some hikers keep boots on to save time and effort. For deeper, longer, or multiple crossings, removing boots and putting on water shoes or old sneakers is generally better for foot health and comfort, preventing saturated boots from causing blisters later.
Q: How do I deal with hypothermia risk after a cold crossing?
A: After a cold crossing, prioritize getting into dry clothes immediately. Have a dedicated dry bag for emergency warm layers (down jacket, wool socks). Consume warm liquids and high-calorie snacks. If shivering is intense, set up your shelter and get into your sleeping bag right away.
Q: What if I fall during a crossing?
A: If you fall, prioritize getting your feet downstream and your head upstream. Use your outstretched arms to push off obstacles and try to float on your back, angling towards the nearest bank. Remember, your unbuckled pack makes shedding it easier if it becomes an entanglement risk.
Ready to ford those creeks and tackle those challenging river junctions? With these techniques and a healthy respect for nature's power, you'll be well-equipped to navigate water crossings safely and confidently on your next adventure.
Inspired to hit the trails? Gear up for your next adventure with our expert-recommended essentials, available on Amazon. [Link will be automatically inserted here]