How to Use Trekking Poles Correctly (2026 Guide)
Feel awkward with your trekking poles? This 2026 guide unlocks their true power. Learn to set the right length, use straps correctly, and float up hills to save your knees.
You bought them to save your knees on the big descents, to power you up that last scree field. But now, halfway through the hike, your shoulders are aching, the poles feel more like clumsy stilts than precision tools, and you’re secretly wondering if you just wasted $150.
Sound familiar? You're not alone. Most hikers use trekking poles inefficiently, robbing themselves of the massive benefits. But a few simple tweaks to your technique can transform them from awkward accessories into your most valuable piece of gear. This is the guide to unlocking their true potential.
TL;DR: The 30-Second Fix
Set Length: On flat ground, your elbow should be at a 90-degree angle. Shorten poles 5-10cm for uphills; lengthen 5-10cm for downhills. Use Straps Correctly: Your hand goes UP through the bottom of the strap, then grips down over the strap and handle. The strap should take the weight, not your hand. Find Rhythm: Move your poles with the opposite foot (right pole forward with left foot). Plant poles beside you, not way out in front.
Why Your Current Technique Isn't Working
If you're ending a hike with sore shoulders, wrists, or biceps, you're probably making one of these common mistakes. Trekking poles should transfer load from your upper body through your core to the ground, reducing strain on your leg joints. They aren't meant to be arm exercise equipment. The most common errors are:
- The Death Grip: Squeezing the handle for dear life. This fatigues your hands and forearms and completely bypasses the load-bearing straps.
- Incorrect Pole Length: Using poles that are too long on uphills or too short on downhills forces your body into an unnatural, inefficient posture.
- Ignoring the Straps: Letting the straps dangle is the single biggest mistake. The strap is the entire key to efficient power transfer.
- Awkward Planting: Stabbing the poles too far in front of you acts like a brake, while flailing them around wastes energy.
Let's fix it, step-by-step.
1. Dial In the Perfect Pole Length
Getting the length right is the foundation. Most adjustable poles have centimeter markings to help you. If you have two- or three-section poles, always set the top section to your preferred 'flat ground' mark and make micro-adjustments with the lower section(s). This keeps them balanced.
On Flat Ground
Stand up straight in your hiking shoes, holding the pole. Adjust the length until your elbow is at a perfect 90-degree angle when the tip is on the ground. This is your baseline. If you have fixed-length poles (like many ultralight 'Z-poles'), you'll choose your size based on this measurement when you buy them.
For Uphills
As the trail gets steep, you'll be planting your poles higher up the slope. To maintain an efficient arm position, you need to shorten your poles. For a moderate incline, shorten them by about 5cm. For a very steep, hand-over-foot ascent, you might shorten them by 10cm or more. This allows you to plant the pole and push yourself up the hill.
For Downhills
Descending is where poles shine for saving your knees. Here, you'll be planting them lower down the slope in front of you to brace. Lengthen your poles by 5-10cm from your baseline. This allows you to maintain an upright posture and absorb impact without having to bend over.
2. Master the Strap (It's Not Just for Your Wrist)
This is the game-changer. Stop thinking of it as a leash to prevent you from dropping your poles. The strap is the handle; the grip is just for steering.
Here’s how to do it correctly:
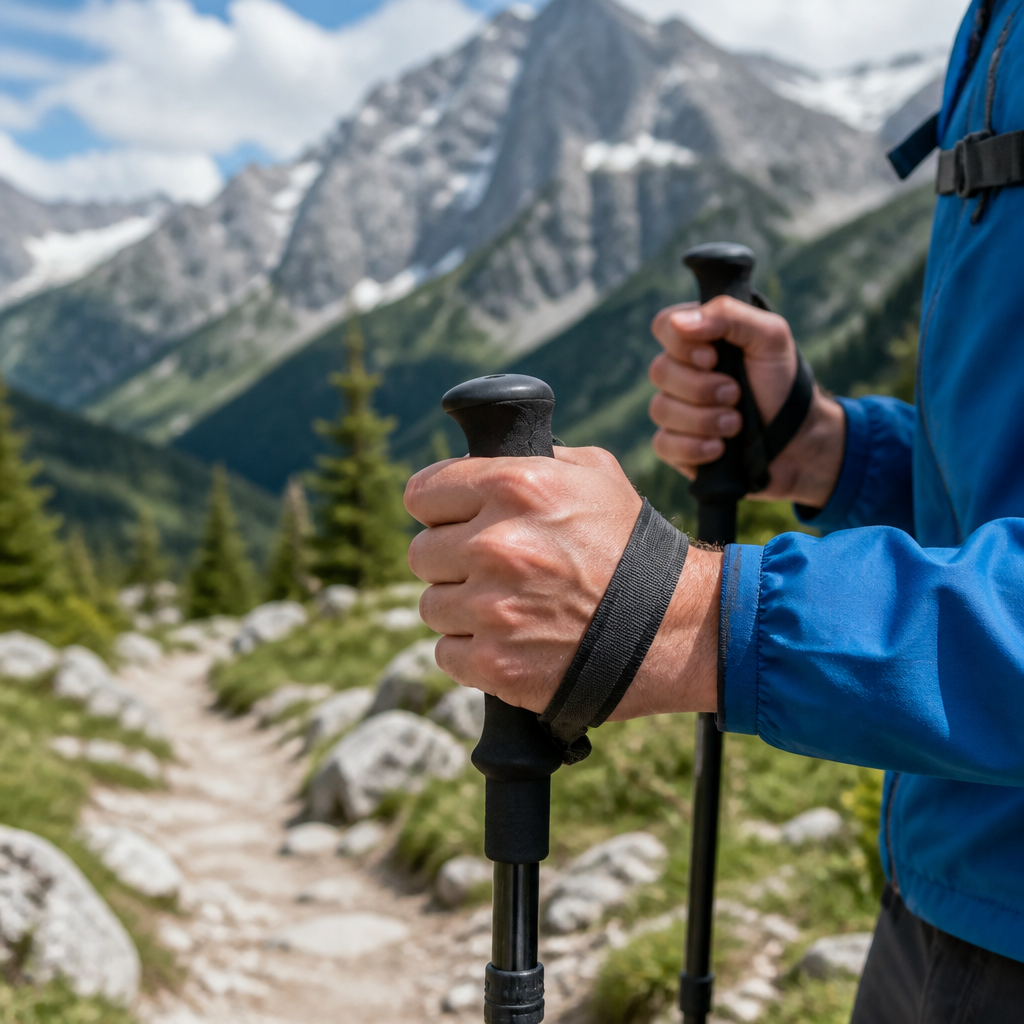
- Open your hand and bring it up from underneath the strap, as if you're doing an uppercut.
- Let the strap loop over the back of your hand and thumb.
- Bring your hand down to grasp the handle, with the strap material between your palm and the grip.
When you do this, you can open your hand completely and lean your weight onto the strap. The force transfers from the strap, through your wrist and forearm, and into your skeletal system. No more death-gripping. You are now pushing off the strap, not pulling on the pole.
3. Find Your Rhythm: The Art of Pole Planting
Now that your length is right and your hands are in the straps correctly, it's time to walk. The goal is to integrate the poles into your natural stride.
The Alternating Gait
This is your workhorse rhythm for 90% of hiking. It mirrors your natural arm swing. As your left foot moves forward, your right arm (and pole) swings forward. As your right foot moves forward, your left arm (and pole) does the same. Plant the pole tip roughly parallel to your rear foot. You're using the pole to push off, propelling you forward. It should feel smooth and natural within a few minutes.
The Double Plant
This technique is for power and stability. On a very steep uphill section, you can plant both poles simultaneously and push off with both arms to power yourself up a step. On a tricky downhill or a stream crossing, planting both poles in front of you creates a stable tripod base before you commit your step.
4. Tackle the Terrain: Uphills and Downhills
Let's put it all together.
- Ascending: Poles shortened. Use the alternating gait. Keep your torso upright. As you step up with your left foot, plant your right pole and actively push off the strap. This engages your lats and core, taking some of the load off your quads.
- Descending: Poles lengthened. Keep them in front of you. Think of it as creating a temporary handrail. Plant one or both poles a step ahead, then walk past them, letting them absorb the impact that your knees and quads would otherwise take. This is how you end a 10-mile hike with fresh legs.
5. Stow and Go: When to Put Your Poles Away
Trekking poles are a tool, and sometimes the best tool is your hands. For Class 3 or 4 scrambles where you need precise handholds on rock, collapse your poles and stow them on your pack. Fiddling with poles in no-fall zones is dangerous. Similarly, on long, flat, non-technical trails, you may find stowing them to be more relaxing than constantly pole-planting.
Gear That Helps: Our 2026 Picks
While technique is king, the right tool makes the job easier. We look for a balance of weight, durability, packability, and ergonomics.
Best Overall: Black Diamond Trail Ergo Cork
A do-it-all workhorse that balances features, durability, and a best-in-class grip.
Why we picked it: The Trail Ergo Cork has been a benchmark for years for good reason. The dual FlickLock adjusters are bomber-solid and easy to use with gloves. The 15-degree corrective angle on the ergonomic cork grip feels incredibly natural. Cork is fantastic for managing sweat and molding to your hand over time. Best for: The hiker who does everything from local trails to multi-day backpacking trips and wants one pole that excels everywhere. Trade-offs: Heavier and less packable than ultralight carbon Z-poles.
Best Ultralight: Black Diamond Distance Carbon Z
Featherlight and incredibly compact, these are the choice for ounce-counters and trail runners.
Why we picked it: When you're trying to move fast and light, every gram matters. These carbon fiber, fixed-length poles are astonishingly light and fold down into a tiny package you can easily stash inside a pack. The deployment is lightning-fast. It's the ultimate minimalist pole. Best for: Ultralight backpackers, thru-hikers, and trail runners who prioritize weight and packed size above all else. Trade-offs: Fixed length means no adjustability for steep terrain. Carbon is more brittle than aluminum if it gets jammed between rocks.
Best Budget: Leki Legacy Lite
A tough-as-nails aluminum pole from a top brand that delivers reliable performance without the high price tag.
Why we picked it: You don't have to spend a fortune to get a great pole. The Legacy Lite uses durable aluminum and Leki's reliable SpeedLock+ external levers. The grip is comfortable, and while it's not as fancy as cork, it gets the job done. It's a fantastic entry into the world of quality trekking poles. Best for: Day hikers and budget-conscious backpackers who want a durable, reliable pole from a trusted manufacturer. Trade-offs: Heavier than carbon or more premium aluminum models; foam grip is less breathable than cork.
Trekking Pole Comparison Table (2026)
| Model | Type | Material | Grip | Best For | | :--- | :--- | :--- | :--- | :--- | | Black Diamond Trail Ergo Cork | Telescoping | Aluminum | Cork | All-Around Performance | | Black Diamond Distance Carbon Z| Z-Pole (Folding) | Carbon Fiber | EVA Foam | Ultralight / Thru-Hiking | | Leki Legacy Lite | Telescoping | Aluminum | Foam/Rubber | Budget-Conscious Hikers |
FAQ
Are trekking poles worth it for day hikes? Absolutely. Even on shorter hikes, poles reduce the cumulative impact on your knees by up to 25%, especially on downhills. They also improve your balance on uneven terrain and can help you establish a more efficient hiking rhythm, reducing overall fatigue.
Carbon vs. Aluminum poles: which is better? It's a trade-off. Carbon is lighter and better at dampening vibrations, but it's more expensive and can shatter under a sharp impact (like getting it stuck between rocks). Aluminum is slightly heavier but more durable; it will bend before it breaks, and you can often bend it back in the field. For most hikers, high-quality aluminum is a perfect choice. For ultralight purists, carbon is king.
What are the different baskets for? The small, narrow baskets that come standard on most poles are for three-season trail use. They prevent the pole from sinking too deep into mud or soft dirt. The large, wide 'snowflake' baskets are for snow. They provide flotation and keep your poles from post-holing in deep powder, making them essential for snowshoeing or winter hiking.
Do I need poles with shock absorption? Generally, no. For most hikers, shock absorbers add weight, complexity, and a 'bouncy' feeling without providing a significant benefit. Proper technique—using the straps correctly and letting your arms and legs absorb impact naturally—is far more effective than a small internal spring.