How to Prevent Blisters on Long Hikes (2026)
Nothing ruins a hike faster than a blister. Learn our field-tested system for how to prevent blisters, from boot fit to on-trail taping, and keep your feet happy.
You’re five miles into a twenty-mile day, the alpine views are just starting to open up, and then you feel it: that familiar, dreaded friction on your heel. A hot spot. You try to ignore it, to adjust your stride, but it’s too late. The damage is done, and every step for the next fifteen miles will be a lesson in pain management. A single blister can derail the most meticulously planned trek.
But it doesn't have to be this way. Blisters are not an inevitable tax on ambition. They are a failure of a system. With the right knowledge and a proactive approach, you can make blisters a forgotten memory. This is our definitive guide to creating an ironclad foot care system that will carry you through any trail, any distance, pain-free.
TL;DR: Your Blister Prevention Cheat Sheet Got a hike tomorrow? Here's the absolute minimum you need to know: Wear well-fitting, broken-in boots. Ditch cotton socks for merino wool (like Darn Tough or Smartwool). Before you even start, apply high-quality athletic tape (like Leukotape P) to any area that has ever given you trouble. If you feel a hot spot on the trail, stop immediately and address it. Do not be a hero.
Why Blisters Form: The Unholy Trinity
Understanding your enemy is the first step to defeating it. Blisters are the result of three conspiring factors: friction, moisture, and heat. When your foot slides around inside your boot, the friction generates heat. Sweat adds moisture to the equation, softening your skin and making it more susceptible to damage. This combination causes the outer layers of skin (the epidermis) to separate from the inner layers (the dermis). The body rushes fluid into that gap to cushion the underlying tissue, and voilà: you have a blister.
Your goal isn't just to treat blisters, but to dismantle this system by tackling each component head-on.
1. Pre-Hike Prep: Your First Line of Defense
Perfect foot care begins long before you set foot on the trail. What you do at home is the foundation for every pain-free mile.
Get the Right Boots (and Break Them In)
This is non-negotiable. The single biggest cause of blisters is poorly fitting footwear. Your boots are your most important piece of gear.
- Get Fitted by a Pro: Go to a reputable outdoor store with knowledgeable staff. Go in the afternoon, when your feet are naturally more swollen. Wear the type of socks you plan to hike in.
- The Rule of Thumb: When the boot is unlaced and your foot is slid forward until your toes touch the front, you should be able to comfortably slide one finger (about a thumb's width) between your heel and the back of the boot.
- Lace for Success: Learn different lacing techniques. A surgeon's knot can lock your heel in place to prevent sliding, while skipping an eyelet can relieve pressure on the top of your foot.
- Break. Them. In. Never, ever wear brand-new boots on a long hike. Start with walks around the neighborhood, then move to short day hikes. Your boots need to mold to your feet, and your feet need to adapt to the boots.
Master Your Sock System
If boots are the foundation, socks are the insulation. The right sock system wicks moisture and minimizes friction. The wrong one is a blister factory.
- No Cotton, Ever: Cotton absorbs sweat like a sponge and stays wet, which softens skin and dramatically increases friction. It's the worst possible material for a hiking sock.
- Embrace Merino Wool: Merino wool is king. It wicks moisture away from your skin, regulates temperature (warm in the cold, cool in the heat), and is naturally antimicrobial, which reduces odor. Brands like Darn Tough, Smartwool, and Icebreaker are industry leaders for a reason.
- Consider a Liner Sock: For many hikers, a two-sock system is the ultimate weapon. A thin, synthetic, or silk liner sock wicks moisture off the foot, while the thicker wool sock wicks it away from the liner. The magic is that any friction now happens between the two sock layers, not between the sock and your skin. Injinji toe sock liners are particularly effective as they also prevent toe-on-toe blisters.
Toughen Up Your Feet
Conditioning your feet can make them more resilient. Trim your toenails short and file the edges smooth to prevent them from digging into adjacent toes or the front of your boot on descents.
2. On-Trail Tactics: Proactive Foot Care
Once you're hiking, the game shifts from preparation to active management. Your job is to stay ahead of problems before they begin.
The Pre-Hike Ritual: Taping Hot Spots
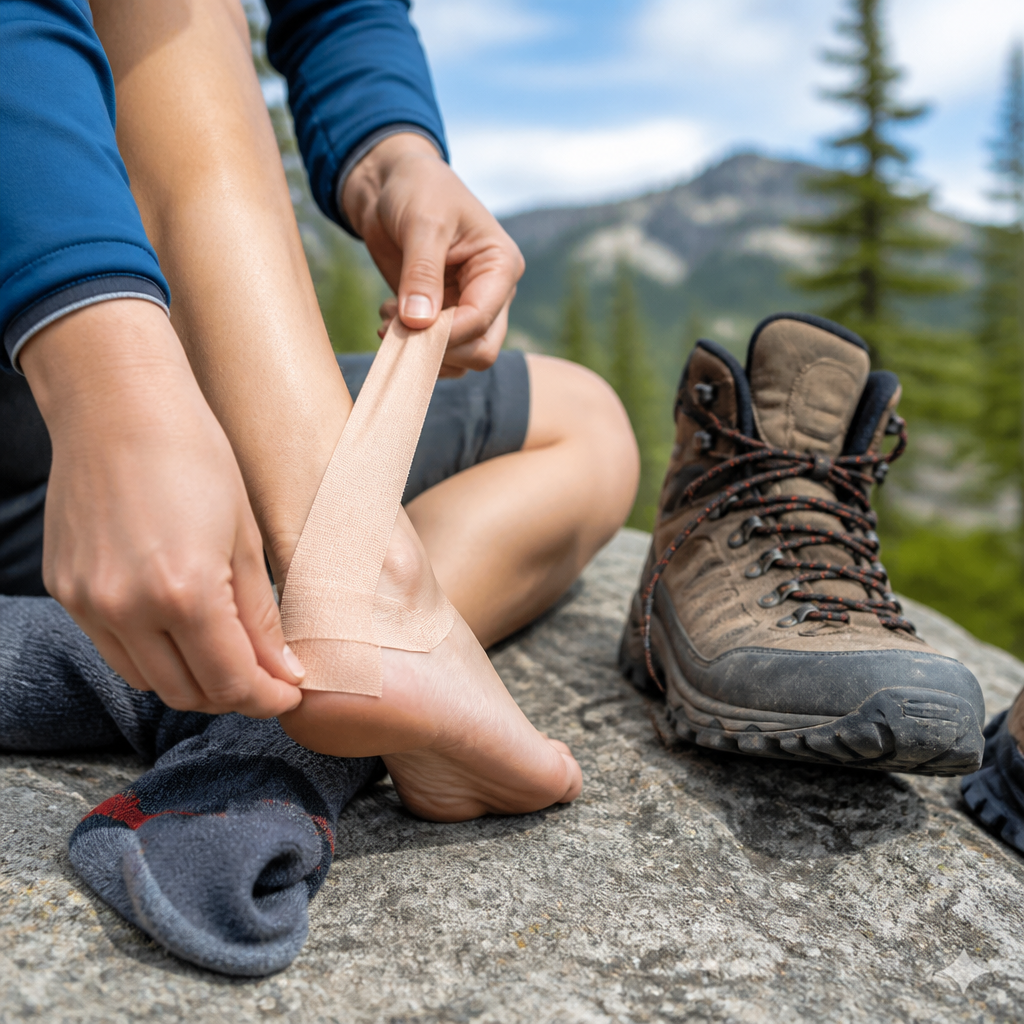
This is the most impactful habit you can adopt. Before you even put your socks on, apply tape to your known problem areas. Is it always the back of your heel? The side of your big toe? Tape them now, not when they start to hurt.
Leukotape P is the gold standard for this. It's a high-tensile, incredibly sticky athletic tape that stays put for days, even with sweat and friction. Apply it directly to clean, dry skin. Cut rounded corners on your tape pieces to prevent them from catching on your sock and peeling off. Other options like KT Tape can work, but Leukotape's adhesion is legendary among long-distance hikers.
Manage Moisture Like a Pro
Dry feet are happy feet. Even with the best socks, your feet will sweat.
- Take Sock Breaks: On any hike over a few hours, plan to take a mid-day break. Take your boots and socks off and let your feet air out for 15-20 minutes. This makes a monumental difference.
- Pack a Spare Pair: Always carry at least one extra pair of hiking socks. If you step in a creek or your feet are just feeling swampy, swap to a dry pair. Strap the wet ones to the outside of your pack to dry as you walk.
- Use Foot Powder: If you're a particularly heavy sweater, consider using a foot powder like Gold Bond Medicated Powder or an antifungal powder before you put your socks on. This helps absorb excess moisture.
Listen to Your Feet: The Hot Spot Drill
This is the moment of truth. A hot spot is a pre-blister. It’s your body’s final warning signal. You must stop the instant you feel one. Don't tell yourself it's nothing or that you'll deal with it at the next break.
- Stop. Immediately. Drop your pack.
- Inspect. Take off your boot and sock. Look at the area. Is it just red? Is the skin wrinkled?
- Treat. Dry the area completely. If the skin is intact, apply a piece of Moleskin or, even better, Leukotape directly over the hot spot. Ensure the tape is smooth, with no wrinkles.
- Re-lace. Put your sock and boot back on, paying special attention to your lacing to ensure your heel is secure.
This five-minute stop can save you days of misery.
3. Post-Hike Recovery & Emergency Treatment
Your work isn't done when you reach camp.
End-of-Day Care
First thing at camp, get out of your hiking boots and socks. Let your feet breathe. If you have camp shoes like Crocs or sandals, change into them. If there's a water source, soaking your tired feet in the cold water can feel incredible and help reduce swelling. Before bed, clean and dry them thoroughly.
Treating a Blister That Formed Anyway
Sometimes, despite your best efforts, a blister forms. Now what? The backcountry medical advice is clear: if the blister is large, painful, and likely to pop on its own in your boot, it's better to drain it in a controlled, clean way.
- Sterilize: Clean the blister and the surrounding skin with an alcohol wipe. Sterilize a safety pin or needle with a flame until it's red hot, then let it cool, or clean it thoroughly with another alcohol wipe.
- Drain: Gently pierce the base of the blister in one or two spots. Press gently to drain the fluid. Do not remove the roof of the blister. This skin is your body's own sterile bandage.
- Protect: Apply an antibiotic ointment. Cover it with a dedicated blister bandage like a Compeed or 2nd Skin patch. These hydrocolloid bandages create a moist, cushioned environment that promotes healing. Alternatively, cut a "donut" out of a piece of Moleskin, placing the hole over the blister and a second piece over the top to create a protected pocket.
Gear That Helps: Your Anti-Blister Toolkit
Building a small, dedicated foot care kit is one of the smartest things a hiker can do. Here are the essentials.
| Product Type | Best For | Our Pick | Why It Works | |----------------------|----------------------------------------|-------------------|------------------------------------------------------------------------------| | Merino Wool Socks | All-purpose hiking, moisture management | Darn Tough Hiker | Wicks sweat, dries fast, durable, and has an unconditional lifetime guarantee. | | Sock Liners | Extreme blister prevention, toe friction | Injinji Liner Crew | Separates each toe to eliminate skin-on-skin friction, excellent moisture wicking. | | Prevention Tape | Pre-taping hot spots, durability | Leukotape P | Incredibly sticky and tough. Stays on for days, creating a frictionless barrier. | | Blister Bandages | Treating formed blisters, cushioning | Compeed | Hydrocolloid gel pad cushions the blister and accelerates healing. Acts like a second skin.| | Foot Powder | Heavy sweaters, humid conditions | Gold Bond Powder | Absorbs moisture to keep skin drier and tougher, reducing friction. |
Common Mistakes to Avoid
- Wearing cotton socks. We can't say it enough. Just don't.
- Ignoring a hot spot. Thinking you can "walk it off" is the #1 way to turn a minor issue into a trip-ending disaster.
- Hiking in brand-new boots. A rookie mistake with painful consequences.
- Ripping the top skin off a blister. This exposes raw, sensitive skin to infection and immense pain.
- Using duct tape. While it works in a desperate pinch, it leaves a gummy residue and doesn't breathe, which can trap moisture and worsen the problem. Use proper medical tape.
Blisters are a sign that something in your foot system—boots, socks, lacing, or hygiene—is wrong. By systematically addressing each potential failure point, you take control. You transform your feet from a liability into a reliable asset. Now, go enjoy that view from the top, you've earned it.
FAQ
Q: Are gel or silicone toe caps worth it? A: Yes, for specific problems. If you consistently get blisters on the tips or tops of your toes from them rubbing against the boot, a silicone toe cap can provide excellent cushioning and protection. They are a targeted solution for a targeted issue.
Q: How do I tape my heel so the tape doesn't bunch up? A: The key is using one or two strips and applying them without tension. For a classic heel taping, use a 3-4 inch strip of Leukotape. Anchor it under your heel and pull it straight up the Achilles tendon, smoothing it down. You can add two more strips on either side, slightly overlapping, to create a secure pocket. Always round the corners of the tape with scissors to prevent peeling.
Q: Is it better to pop a blister or leave it alone? A: If the blister is small and not painful, leaving it alone is best. The fluid will reabsorb. However, if it's a large, tense blister in a high-friction area (like your heel), it's almost certainly going to pop messily inside your boot. In that case, it is better to drain it yourself in a clean, controlled manner as described above. Always leave the roof of skin intact.
Q: Can I use duct tape for blisters in a pinch? A: You can, but it should be a last resort. Duct tape's advantage is that it's sticky and you might already have it. The disadvantages are significant: it doesn't breathe, trapping moisture against your skin (which can create new blisters), and the adhesive can be harsh and leave a sticky, dirt-collecting residue. A small roll of Leukotape or a few Moleskin pads in your first-aid kit is a far superior option.