How to Pack a Backpack for Hiking Comfort in 2026
Stop fighting a top-heavy, swaying pack. Our step-by-step guide on how to pack a backpack correctly will make your load feel lighter and your hike more enjoyable.
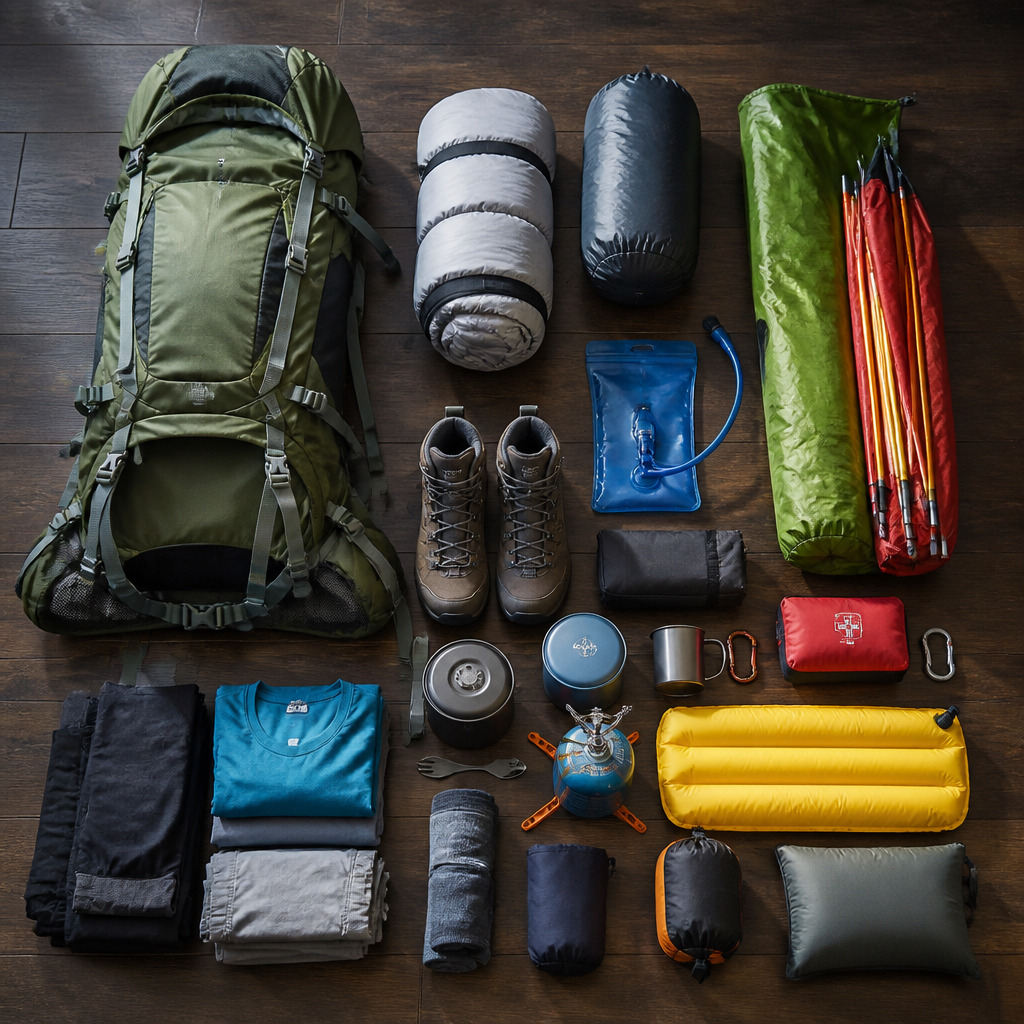
That new pack felt amazing in the store, loaded with sandbags and perfectly fitted by a pro. But ten minutes into your first real hike, it's a different story. The pack sways with every step, your shoulders are already screaming, and you feel like you're fighting a clumsy dance partner strapped to your back. You bought the right gear, but what gives?
The secret isn't just what you carry, but how you carry it. Packing a backpack is a science, one that separates blissful miles from a grueling slog. Forget just stuffing things in; we're going to build a stable, comfortable load that feels like an extension of your body, not a burden upon it.
TL;DR: The Core Principles
In a hurry? Here’s the lightning-fast version. Pack your bag in three main zones, from bottom to top: 1. Bottom: Bulky but light items you don't need until camp (e.g., sleeping bag). 2. Middle/Core: Your heaviest items (food, water, cook set) packed tight against your spine, centered between your shoulder blades. 3. Top: Gear you might need on the trail (rain jacket, puffy, snacks, water filter). Everything else goes in accessory pockets. Heavy stuff in the middle, light stuff at the periphery. That’s the game.
Why Pack Balance is Everything
Think of your body as a lever. When you carry a poorly balanced pack, you're giving the weight a longer lever arm, forcing your core and shoulder muscles to work overtime just to keep you upright. A swaying, top-heavy, or bottom-heavy pack constantly pulls you off-balance, leading to fatigue, soreness, and an increased risk of a misstep or fall.
A properly packed backpack concentrates the densest weight close to your center of gravity—your spine, roughly between your shoulder blades. This creates a stable, unified mass that moves with you. The load is transferred efficiently through the pack's frame and suspension system down to your hips, which are designed to carry weight far better than your shoulders. The result? The pack feels lighter, you're more agile on the trail, and you can hike longer and happier.
Step 1: The Foundation (Bottom Zone)
This is the compartment at the very bottom of your pack, often designed for a sleeping bag. Its purpose is to hold bulky, compressible items that you won't need until you make camp for the night.
What Goes Here:
- Sleeping bag (in a stuff sack or compression sack)
- Sleeping pad (if it's not a foam pad strapped to the outside)
- Camp clothes (e.g., sleep leggings, clean socks)
- Sleeping bag liner
How to Pack It: Start by lining your pack with a pack liner or a durable trash compactor bag. This is your fail-safe waterproofing. Then, stuff your sleeping bag down into the bottom. Many hikers prefer a simple stuff sack over a compression sack for this; a non-compressed bag will fill the nooks and crannies of the pack's bottom more effectively, creating a solid base. Add your other camp-only items around it. The goal is a firm, stable platform for the heavier gear to rest on.
Step 2: The Core (Middle Zone)
This is the most critical step for comfort. The middle zone of your pack, directly against the back panel, is where you'll place your heaviest and densest gear. This aligns the weight with your spine and hips.
What Goes Here:
- Your food bag (all food for the trip, except that day's snacks)
- Cook set (pot, stove, fuel canister)
- Water reservoir (if you use one, pack it first, directly against the back panel)
- Bear canister (if required)
- Heavier, dense parts of your tent (e.g., the tent body and fly if packed separately from the poles)
How to Pack It: If you use a water reservoir like a CamelBak or Platypus, slide it into the dedicated hydration sleeve first. Next, place your heaviest item. This is usually your food bag or a bear canister like a BearVault BV500. Position it so it's centered and sits in the sweet spot between your shoulder blades. Now, pack your other heavy items (cook kit, fuel) around it, filling in the gaps. The goal is to create a tight, unmoving block of weight. Use softer items like extra clothes or your tent fly to pad the space and prevent hard objects from poking you in the back.
Step 3: The Attic (Top Zone)
The top third of your main compartment is for your essentials and layers. These are the items you're most likely to need access to during the day without having to perform a full pack explosion on the side of the trail.
What Goes Here:
- Insulated puffy jacket
- Rain shell
- Fleece or mid-layer
- First-aid kit
- Water filter (like a Sawyer Squeeze or Katadyn BeFree)
- Toiletries and trowel
- Lunch and the day's snacks (if not in outside pockets)
How to Pack It: Keep these items loose or in lightweight stuff sacks for easy access. We like to put our rain gear right on top, so it's the first thing we can grab if the weather turns. Your insulated jacket should also be near the top for quick warmth during breaks. Think about the order of operations: what will you need first? Pack that last so it's on top.
Step 4: The Exterior & Pockets (Accessory Zones)
The lid (or "brain"), hip belt pockets, and side pockets are your quick-draw holsters. They are for small, essential items you need constantly, or for gear that's awkward to pack inside.
What Goes Here:
- Lid/Brain: Headlamp, map, compass, GPS/satellite messenger (like a Garmin inReach Mini), keys, wallet, first-aid basics (blister care, painkillers).
- Hip Belt Pockets: High-energy snacks, phone, lip balm, sunscreen.
- Side Pockets: Water bottles (Smartwater bottles are an ultralight favorite), tent poles, trekking poles when not in use.
- Front Mesh Pocket: A damp rain fly, a wet towel, or a layer you just shed. This is a great spot for wet gear to air out.
How to Pack It: Be strategic. Hip belt pockets are for on-the-move access. The lid is for at-a-rest-stop access. Avoid the temptation to strap too much to the outside of your pack—a phenomenon known as "dangle-fest." Dangling items can swing, throw off your balance, and get snagged on branches.
Step 5: The Final Squeeze (Compression)
Once everything is inside, it's time to make it one solid unit. Cinch down the internal compression strap if your pack has one, then close the top. Work your way down the pack, tightening all the external compression straps. Start with the ones at the bottom, then the middle, then the top. The goal is to eliminate any empty space and create a dense, rigid cylinder of gear that won't shift as you move. Don't be shy—pull them tight. This step is what truly transforms a bag of loose gear into a stable, comfortable load.
Gear That Helps: Organizational Tools
While you can just stuff things in, a few key items make organization and access a dream.
| Tool | Best For | Why We Like It | Example Brands | | :--- | :--- | :--- | :--- | | Compression Dry Sack | Sleeping bags, clothing | Shrinks bulky items & keeps them dry. Essential for down gear. | Sea to Summit, Outdoor Research | | Ultralight Pods/Cubes | Food, clothing | Rectangular shape packs more efficiently than round sacks, reducing dead space. | Hyperlite Mountain Gear, Zpacks | | Standard Dry Sacks | Anything needing waterproofing | A lighter, non-compressing option for electronics, first-aid, etc. | Osprey, Sea to Summit | | Ziploc Bags | Small items, trash | Cheap, waterproof, transparent. Perfect for snacks, toiletries, and packing out trash. | Ziploc, Hefty |
Common Packing Mistakes to Avoid
- The Top-Heavy Terror: Putting your food or water too high in your pack. This will constantly pull you backward.
- The Bottom-Out: Placing dense, heavy items in your sleeping bag compartment. This creates a low-slung pendulum that pulls on your shoulders.
- The Yard Sale: Not using stuff sacks. Loose items are hard to find and shift around, throwing off your balance.
- The Spine-Poker: Packing a hard, pointy object (like a stove or tent pole tip) directly against the back panel without any padding.
- The Dangle-Fest: Strapping too much gear to the outside. A swinging Nalgene or dangling camp shoes will drive you crazy and compromise your stability.
FAQ
Q: How do I pack a tent in a backpack?
A: Most hikers find it best to separate the tent components. Pack the tent body and rainfly inside your pack, often stuffed into the gaps in the main compartment to pad harder items. The poles and stakes can be packed together in their sack and slid into a side water bottle pocket and secured with a compression strap. This distributes the weight and shape more effectively than trying to cram the whole tent bag inside.
Q: How does packing change for an ultralight frameless pack?
A: With a frameless pack, your gear is the frame. Many ultralight hikers use a folded foam sleeping pad (like a Therm-a-Rest Z Lite Sol) against the back panel to provide structure and padding. The principle of keeping heavy weight centered remains, but it's even more critical. The load must be more compact, and you generally need to carry less weight overall (under 20-25 lbs) for the system to be comfortable.
Q: Where does a bear canister go in my pack?
A: Ideally, a bear canister goes inside your pack in the middle core zone, as close to your spine as possible. If it's too wide to fit vertically, try packing it horizontally. If it absolutely won't fit inside (a common issue with smaller volume packs), you may have to strap it to the top of your pack, under the lid. While not ideal for your center of gravity, it's better than strapping it to the bottom or letting it dangle.
Q: Should I use a water bladder or bottles?
A: This is a personal preference that affects packing. A bladder/reservoir keeps the water weight perfectly centered against your spine, which is great for balance. However, they can be a pain to refill and it's hard to track how much you've drunk. Bottles in side pockets are easy to access and refill, but the weight is on the periphery. Many hikers use a hybrid approach: one bottle for easy access and filtering, and a bladder for bulk water storage.
Now that your pack is dialed in for maximum comfort, you're ready to hit the trail. Pick a destination from our Trail Guide library and put your new skills to the test.