Complete Guide to the Four Pass Loop (2026)
Planning the epic Four Pass Loop? Our 2026 guide covers permits, trail sections, campsites, and pro tips to conquer this iconic Colorado backpacking trip.
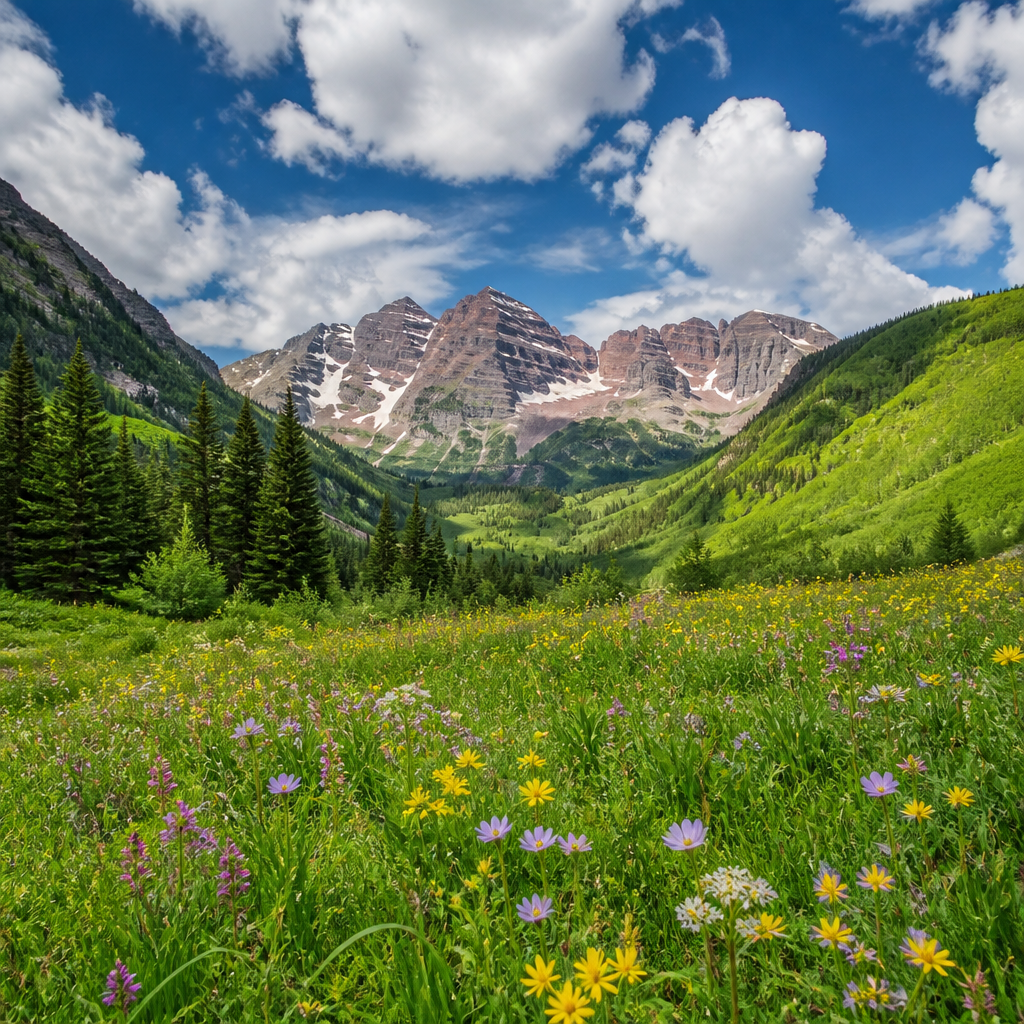
You've seen the photos a hundred times: the jagged, wine-striped peaks of the Maroon Bells perfectly reflected in a glassy alpine lake. It’s one of the most photographed scenes in Colorado. But you’re not here for that. You’re here for what lies beyond the day-trippers and the easy views. You’re here for the Four Pass Loop, a 26-mile rite of passage that tests your lungs, legs, and mountain sense. This guide is for you—the backpacker ready to earn those views over four staggering 12,000-foot passes and discover the wild heart of the Elk Mountains.
Trail Snapshot: The Vitals
Before you even think about lacing up your boots, get familiar with the core stats of this demanding trek.
| Stat | Details | | :--- | :--- | | Total Distance | ~26 miles (42 km) | | Total Elevation Gain | ~8,000 feet (2,438 m) | | Difficulty | Strenuous / Difficult | | Typical Duration | 3-4 days | | Permits Required? | Yes, overnight permits are mandatory and highly competitive. | | Best Season | Mid-July through September | | Dogs Allowed? | Yes, on leash. |
Getting to the Trailhead
The Four Pass Loop begins and ends at the Maroon Lake Trailhead, located about 10 miles from Aspen, Colorado.
By Air: The closest airport is Aspen/Pitkin County Airport (ASE), but it's often more affordable to fly into Denver International Airport (DEN) and make the 4-hour drive.
By Car & Shuttle: Access to the trailhead on Maroon Creek Road is heavily restricted during the summer and early fall (typically May to October). You cannot drive your personal vehicle to the trailhead between 8 AM and 5 PM. Instead, you must park at Aspen Highlands Ski Area and take the mandatory RFTA shuttle bus. You'll need separate reservations for both the bus and your overnight permit.
Arriving before 8 AM or after 5 PM allows you to drive to the limited parking at the trailhead, but this is a risky strategy as parking fills up extremely fast. The shuttle is the most reliable option.
Trail Description: A Section-by-Section Guide
Most hikers tackle the loop clockwise, which is the direction we'll describe here. This orientation gets the longest, most exposed climb (West Maroon Pass) out of the way on Day 1 and provides a more gradual ascent to Trail Rider Pass. A 4-day/3-night itinerary is standard.
Section 1: Maroon Lake to West Maroon Pass
- Distance: ~6.5 miles
- Highlights: Classic Maroon Bells views, gradual ascent, a challenging final push.
Your journey starts at the mobbed Maroon Lake viewpoint. Snap your picture and leave the crowds behind as you follow the trail west towards Crater Lake. The path winds through aspen groves before reaching the more rugged terrain around Crater Lake. This is your last easy mile.
The trail continues up the West Maroon Creek valley. The ascent is gradual but steady, crossing the creek several times. The valley is a classic U-shaped glacial canyon, with steep walls and a lush, willow-filled floor. The final mile to the top of West Maroon Pass (12,500 ft) is a grueling series of steep switchbacks on loose scree. Take your time, breathe deep, and be rewarded with panoramic views back down the valley you just climbed.
Section 2: West Maroon Pass to Fravert Basin
- Distance: ~4 miles
- Highlights: Stunning ridge traverse to Frigid Air Pass, incredible wildflowers.
From the broad saddle of West Maroon Pass, you'll see your next objective: Frigid Air Pass. The trail traverses a high alpine bench before a short, brutally steep climb to the pass (12,415 ft). While only a short distance, this section can feel exposed. The view from Frigid Air Pass is arguably one of the best on the entire loop, looking south into the pristine Fravert Basin and the white-streaked rock of the Crystal River's headwaters.
Descend from Frigid Air into the basin. In late July, this area explodes with some of the most spectacular wildflower displays in Colorado. Campsites are available in the upper basin, offering solitude and epic views.
Section 3: Fravert Basin to Trail Rider Pass
- Distance: ~6 miles
- Highlights: A long descent and ascent, crossing the Crystal River, views of Snowmass Lake.
This is a long, demanding day. You'll descend deep into Fravert Basin, eventually crossing the North Fork of the Crystal River (this can be a knee-deep ford in early season). After the crossing, the grind begins. You start the long, forested climb towards Trail Rider Pass. The trail is often muddy and relentless.
As you gain elevation, you'll break out of the trees and enter another alpine wonderland. The final push to Trail Rider Pass (12,420 ft) is steep, but the reward is immense: a jaw-dropping aerial view of the impossibly turquoise Snowmass Lake, cradled beneath Snowmass Mountain.
Section 4: Trail Rider Pass to Buckskin Pass
- Distance: ~5.5 miles
- Highlights: The iconic Snowmass Lake, a challenging climb to the final pass.
Be prepared for a knee-pounding descent. The trail drops over 1,500 feet via rocky switchbacks to the shores of Snowmass Lake. This is one of the most popular camping areas on the loop, and for good reason. It’s a stunning spot to spend a night.
From the lake, the trail continues its descent before beginning the final major climb of the trip to Buckskin Pass. You'll ascend through meadows and rock fields, with ever-improving views back toward Snowmass Mountain. The final switchbacks to Buckskin Pass (12,500 ft) are notoriously steep and exposed. From the top, you're greeted with a staggering, in-your-face view of Pyramid Peak and the Maroon Bells—a perfect climax to your four-pass journey.
Section 5: Buckskin Pass to Maroon Lake
- Distance: ~4 miles
- Highlights: A long, scenic descent back to the start.
The hard work is done. All that's left is a long, 3,000-foot descent back to the trailhead. The trail switchbacks down from the pass through alpine tundra into the forest. You’ll pass through Minnehaha Gulch and eventually link back up with the trail near Crater Lake, completing the loop. The final walk through the aspens feels triumphant, and the crowds at Maroon Lake will seem a world away from the solitude you just experienced.
Water & Camping
Water: Water is plentiful along the entire route from streams and creeks. You are never more than a few miles from a reliable source. However, all water must be treated. A lightweight squeeze filter like the Sawyer Squeeze or Katadyn BeFree is perfect for this trip.
Camping: A permit is required for all overnight stays within the Maroon Bells-Snowmass Wilderness. Permits are issued for specific camping zones, and you must camp within the zone designated on your permit for each night. These permits are released on a rolling basis on recreation.gov and are extremely competitive. Book as soon as your date becomes available.
- Popular Camping Zones: West Maroon Valley, Fravert Basin, Snowmass Lake, Crater Lake.
- Bear Canisters: Hard-sided bear canisters are required. The BearVault BV450 or BV500 are standard choices. No exceptions. This is strictly enforced due to heavy bear activity.
Essential Gear Checklist
This is a serious mountain route deserving of serious gear. Go as light as you can, but don't cut corners on safety or shelter.
- Backpack: A 40-60L pack is ideal. Think Osprey Exos 58 or Hyperlite Mountain Gear Southwest 3400.
- Shelter: A sturdy, lightweight tent is crucial for afternoon storms. The Big Agnes Copper Spur HV UL2 is a classic freestanding choice, while the Zpacks Duplex is an ultralight favorite.
- Sleep System: A 20°F quilt or sleeping bag is appropriate for summer. A high R-value sleeping pad like the Therm-a-Rest NeoAir XLite is key for warmth and comfort.
- Footwear: Trail runners with aggressive tread are the modern choice. The Hoka Speedgoat 5 or Altra Lone Peak 8 are trail-proven options. Waterproof boots are heavier and may not dry as quickly after river crossings.
- Safety & Navigation: A GPS device with messaging, like the Garmin inReach Mini 2, is highly recommended. Carry a map and compass as a backup and know how to use them.
- Cooking: Canister stove, fuel, pot, and spoon. Dehydrated meals from Peak Refuel or Mountain House are easy and calorie-dense.
- Clothing: No cotton. Pack merino wool base layers, a fleece mid-layer, a puffy jacket (like the Arc'teryx Atom Hoody), and full rain gear (jacket and pants).
- Other Essentials: Headlamp, water filter, bear canister, first-aid kit, trowel, sunglasses, sunscreen.
Pro Tips for a Successful Trip
- Acclimatize Seriously: Spend at least two nights at altitude (8,000 ft+) in Aspen, Leadville, or Buena Vista before starting your hike. Altitude sickness can ruin your trip and is dangerous.
- Start Passes Early: Be on the trail by sunrise on days you're climbing a pass. The goal is to be up and over any pass by noon to avoid the common and dangerous afternoon thunderstorms.
- Embrace the Clockwise Route: For first-timers, we recommend the clockwise direction. It front-loads the longest climb but breaks up the other ascents and descents more logically.
- Check Conditions: Before you leave home, and again when you arrive in Aspen, check the trail conditions report on the Aspen-Sopris Ranger District website. Snow can linger on the passes well into July.
- Book Everything in Advance: Your overnight permit, your shuttle bus reservation—get it all locked in months ahead of time. Spontaneity is not a winning strategy for the Four Pass Loop.
FAQ
How difficult is the Four Pass Loop really? It is genuinely difficult. This is not a hike for beginners. The challenge comes from the combination of sustained high altitude (the entire loop is above 9,500 feet), significant daily elevation gain and loss (2,000-3,000+ feet), and potentially hazardous weather. You need a strong base of fitness and experience with multi-day backpacking.
Which direction should I hike the Four Pass Loop? Clockwise is the most common and generally recommended route. It tackles the grueling West Maroon Pass fresh on Day 1 and offers a more gradual ascent to Trail Rider Pass from the Crystal River. Counter-clockwise provides a more dramatic reveal of the Maroon Bells from Buckskin Pass but involves a very long, steep ascent from Snowmass Lake to Trail Rider Pass.
What is the best month to hike the Four Pass Loop? Late July and August offer peak wildflower season and the highest probability of snow-free passes. Early to mid-September provides fewer crowds, fewer bugs, and beautiful fall colors as the aspens change, but comes with a higher risk of an early-season snowstorm.
Do I really need a bear canister? Yes, 100%. A hard-sided bear canister is mandatory and non-negotiable for all overnight hikers. Rangers patrol and will issue tickets. This is for your safety and the safety of the bears.
What happens if I don't get a permit? If you don't secure an overnight permit, you cannot legally camp along the loop. You can, however, day hike sections of it. Some ambitious trail runners complete the entire loop in a single day, but this requires an elite level of fitness and acclimatization.